Geekzone: technology news, blogs, forums
Guest
Welcome Guest.
You haven't logged in yet. If you don't have an account you can register now.


View this topic in a long page with up to 500 replies per page Create new topic
1 | 2 | 3 | 4 | 5 | 6 | 7 | 8 | ... | 10
Paul1977
5171 posts

Uber Geek
+1 received by user: 2192


  #3383487 13-Jun-2025 09:26
Send private message

SepticSceptic:


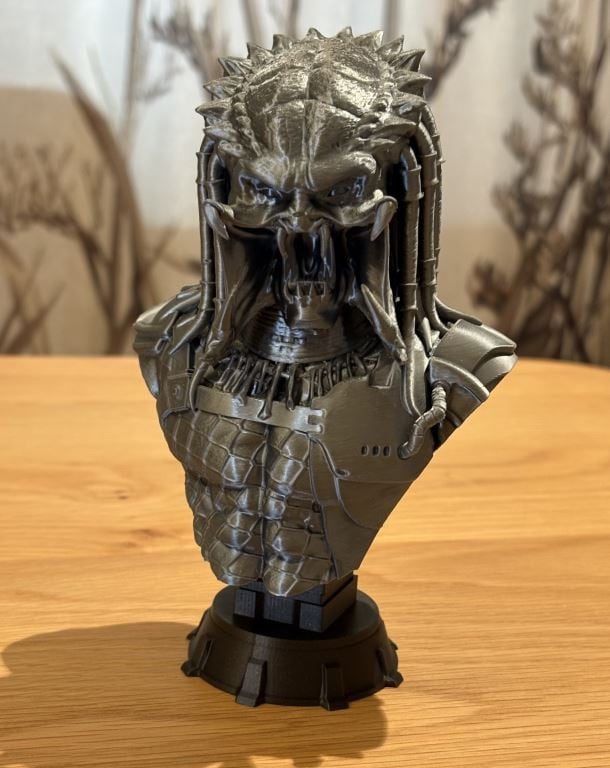
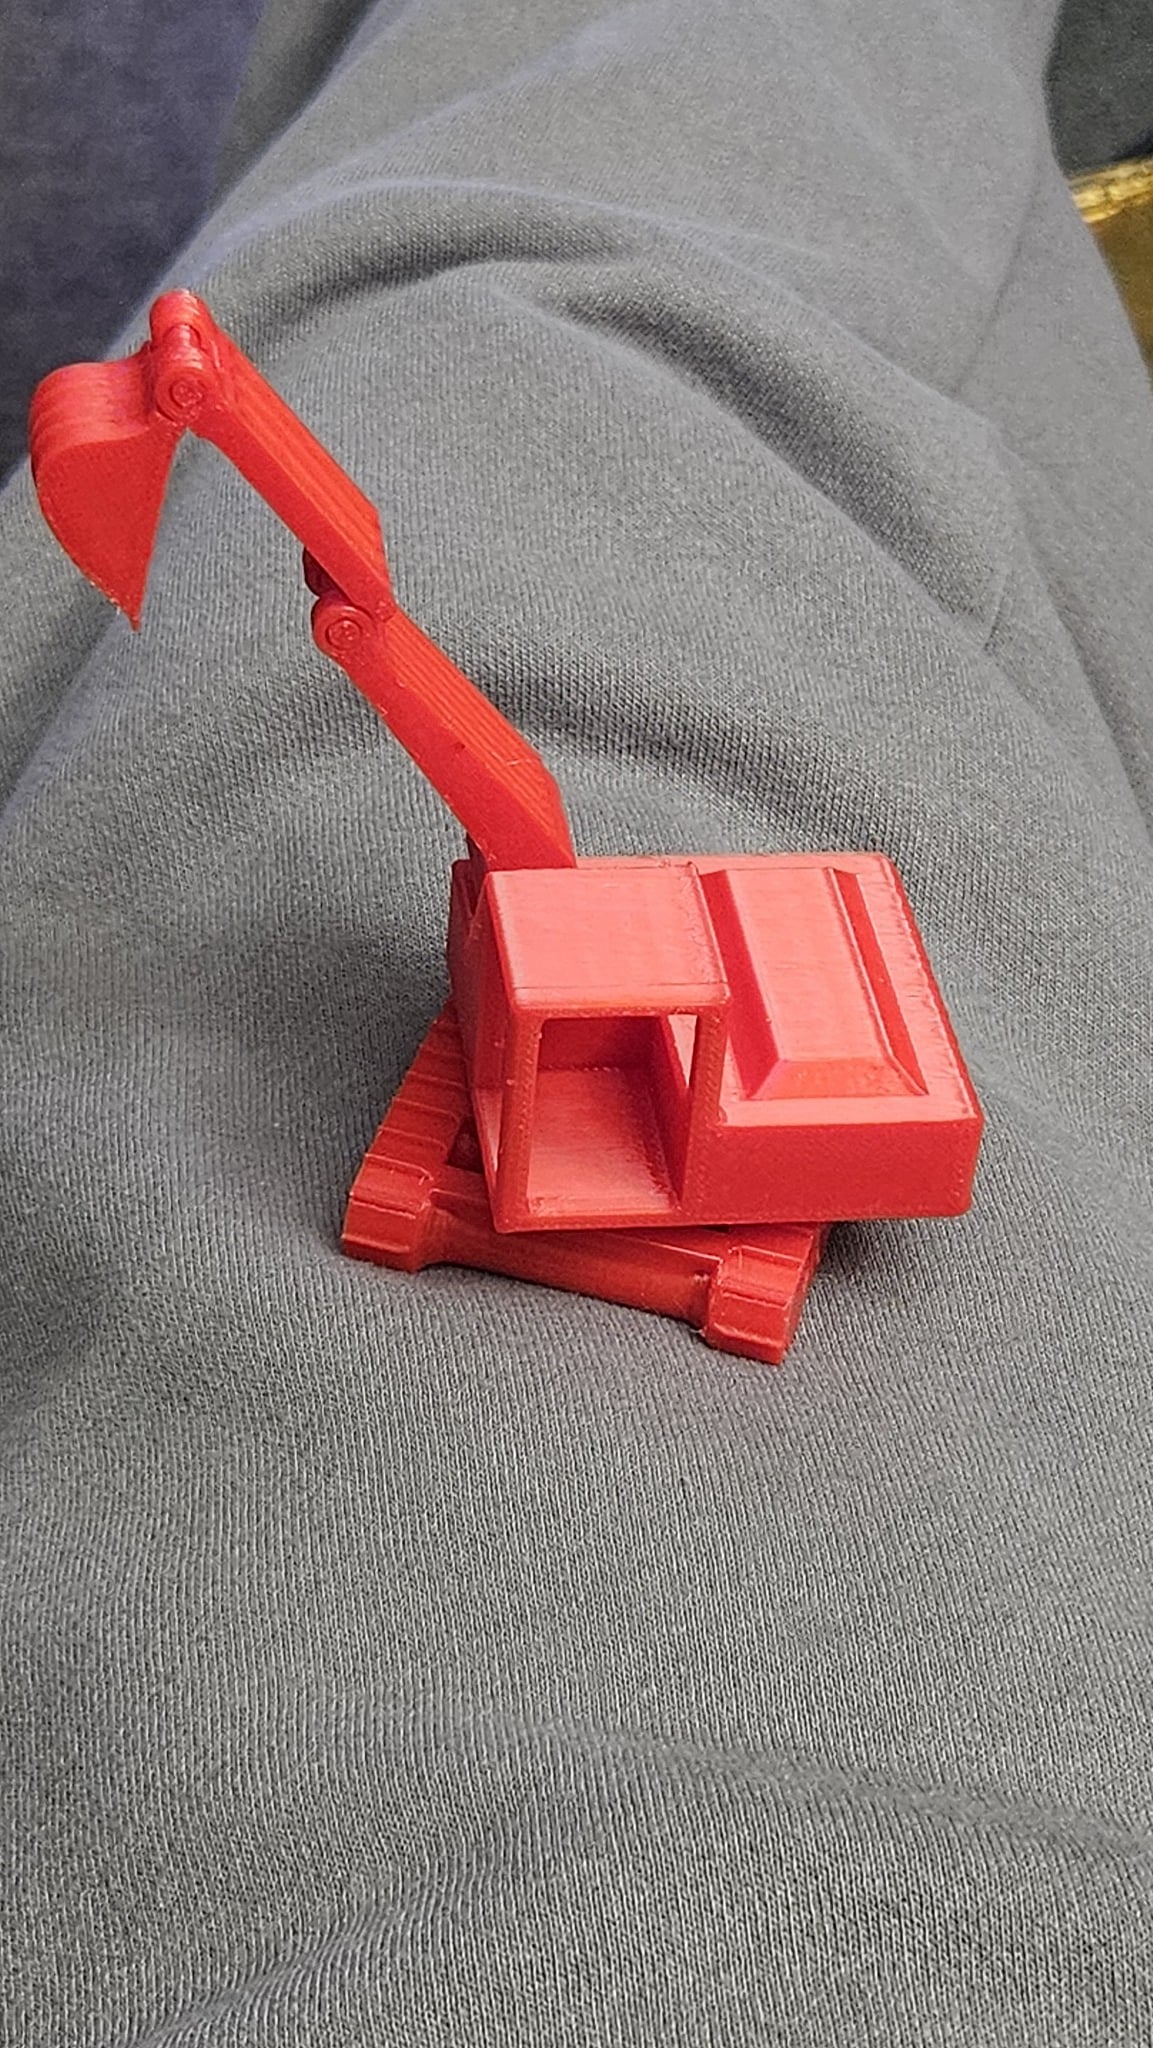
Those are gorgeous prints..


The technology has certainly improved considerably over the recent years.


I have an old CubePro for occasional use, certainly doesn't do the quality prints as you have made.


Thanks, but I can't take much credit. Far cleverer people than me designed them and created optimised project files - I essentially just click "print".


Although I will take a little credit for the swordsman on the mountain, because it required a fair bit of patience and a steady set of hands to remove all the supports for the tree without breaking the branches off. Took a good 30min and had to borrow my partners set of little jewellery pliers and cutters. It also printed as multiple parts, some of which needed a little superglue to keep them firmly in place. So was by far the fiddliest one I've done.


Paul1977
5171 posts

Uber Geek
+1 received by user: 2192


  #3383606 13-Jun-2025 11:51
Send private message

Some things I've learned that will be common knowledge for people with a little experience, but might be helpful for beginners like me...


Keeping filament dry is important. I think PLA is pretty forgiving, but PETG and others less so. Helpful things to know about that:


  • A lot of users recommend drying brand new PETG before use as they often arrive with more moisture content than ideal. I don't know how true that is, but I dried my first (and only) PETG spool before using it and had zero print issues.
  • Even though the Bambu P1S doesn't have a specific function for it, you can dry filament in it with manual settings How to Dry Filament on the X1 and P1 Series Heatbed | Bambu Lab Wiki. Downside is it ties your printer up for 12 hours, and you have to manually flip the spool at the 6 hour mark.
  • Good desiccant and lots of it helps. I printed a full desiccant holding kit for my AMS so I can pack in much more desiccant, and purchased some colour changing rechargeable desiccant to fill it with. Humidity reported by the AMS dropped from hovering between 24-29% since I purchased it two weeks ago, right down to 6% within a few hours of installing the kit and extra desiccant.
  • A lot of people report that food dehydrators work just as well as filament dryers. I haven't tried yet, but picked up a cheap one off Trademe for about $40 - just need to either cut the centre out of a couple of the trays, or print some risers, in order to fit filament spools in it. I'll probably just cut the centre out of the trays as will be faster and cheaper than trying to print the correct diameter risers. Will report back if this works well (if not I've only lost $40). Also plan to recharge desiccant in the dehydrator as recommended by a fellow Geekzoner.

Let everything completely cool before removing from the plate. At least on the textured plate that came with my printer this makes removal from the plate much easier. Especially PETG, which once cooled required little (to no) effort to remove from plate. Depending what I printed, as it cooled after printing was finished I could hear the PETG print "pop" off the plate on its own once the temperature dropped low enough (moving forward I probably won't sit there listening for it though).


Clean your printing plate between prints. I'm just using dishwash liquid and hot water, then once dried a quick spray and wipe with isopropyl alcohol and a soft cloth for good measure. Then I keep my greasy fingers off it.


When removing supports, slow and steady wins the race. Some come off easy, but others can be trickier, and you don't want to ruin a multi-hour print by being too rough removing your supports at the end.


If some of the more experienced users want to chime in with other tips, or correct me if I'm suggesting the wrong things, please do so. It's all a bit of a learning curve.


EDIT: To add that AMS is now showing 3% humidity. I don't know how accurate the built-in sensor is, because that's crazy dry - but I'll take it!


EDIT 2: Adding the anti-vibration feet make a big difference to how much the printer shakes/wobbles my desk. The printer itself sways more now, but apparently that doesn't impact print quality.


Silvrav

477 posts

Ultimate Geek
+1 received by user: 173

ID Verified

  #3383616 13-Jun-2025 12:04
Send private message

@paul1977 so far so good with PETG - I just need to dial in my settings to get a smoother finish. Either by playing with my settings or downloading projects as you are doing.


Key to PETG is that initial bed temp for the first layer and then waiting for it to completely cool. I have printed a few mods for my printer (poop deflector, poop bucket, buffer holder) and then lots of toys for the kids so far. Did one practical print to date for my controllers. added the single controller to tinkercad, duplicated it and added a support between the 2 to make it one holder.


and then got more colors finally from pbtech.


Silvrav

477 posts

Ultimate Geek
+1 received by user: 173

ID Verified

  #3383618 13-Jun-2025 12:06
Send private message

@paul1977 that hueforge Alien looks awesome! I want to do some Hueforge prints for art around my house as well as some 3d models of cities. 


I have some sample PLA so I might try that for my minis and see how that goes as I think you are right, PLA might be the better option.


Paul1977
5171 posts

Uber Geek
+1 received by user: 2192


  #3383631 13-Jun-2025 12:38
Send private message

Silvrav:


@paul1977 that hueforge Alien looks awesome! I want to do some Hueforge prints for art around my house as well as some 3d models of cities. 


I have some sample PLA so I might try that for my minis and see how that goes as I think you are right, PLA might be the better option.


And unlike a multicolour 3D print, there was only a tiny about of waste from colour changes. Even with the (possibly overpriced) Bambu filament, that Alien print only cost $2.30.


Matte PLA really helps to hide layer lines, and the satin finish has a very non-plastic appearance. Trade off is that it's weaker and more brittle than regular PLA - but for decorative items that probably doesn't matter.


Did below in PLA Matte, and really like the finish. This model also uses "fuzzy skin" to simulate a concrete-like texture. Each figure is probably around 12cm high.


Paul1977
5171 posts

Uber Geek
+1 received by user: 2192


  #3383747 13-Jun-2025 18:27
Send private message

Got home from work today remove this from the printer and just finished removing the supports. Bust is Bambu PLA Silk+ Titan Gray, and base is Bambu PLA Meta Iron Gray. The finish on some of the Titan Gray went a little weird for some reason (on the back and the arm cut-offs, but overall came out pretty nice).


Shop now for Lego sets and other gifts (affiliate link).

mdf

mdf
3567 posts

Uber Geek
+1 received by user: 1524

Trusted

  #3383767 13-Jun-2025 19:39
Send private message

Nice prints. If you aren't already familiar with it, look into thr adaptive layer height settings. Can make a big difference to print speed and quality, especially on curved surfaces. 


Paul1977
5171 posts

Uber Geek
+1 received by user: 2192


  #3383771 13-Jun-2025 20:30
Send private message

mdf:


Nice prints. If you aren't already familiar with it, look into thr adaptive layer height settings. Can make a big difference to print speed and quality, especially on curved surfaces. 


Thanks, this one was set at 0.08mm for the whole thing I think, so it took forever to print - variable sounds like a smarter approach. Was also just reading that I might have needed to tweak the outer wall speed for the Silk+ PLA (which I didn’t do), might do some small tests because it’s a nice looking filament, but the finish was a bit “off” in some places, and I suspect it might be where it was going faster.


EDIT: Yep, Bambu recommends outer wall speed of 50mm/s for Silk+, I did it at 200mm/s... oops.


Silvrav

477 posts

Ultimate Geek
+1 received by user: 173

ID Verified

  #3383773 13-Jun-2025 20:35
Send private message

Print in place articulated is just magic to me. My 3 year old loves anything construction related. This took 2 hours to print at about 50c cost.


Paul1977
5171 posts

Uber Geek
+1 received by user: 2192


  #3383779 13-Jun-2025 20:58
Send private message

Silvrav:


Print in place articulated is just magic to me. My 3 year old loves anything construction related. This took 2 hours to print at about 50c cost.


That's clever. I haven't tried anything like that yet.


mdf

mdf
3567 posts

Uber Geek
+1 received by user: 1524

Trusted

  #3383805 13-Jun-2025 22:39
Send private message

Silvrav:


Print in place articulated is just magic to me. My 3 year old loves anything construction related. This took 2 hours to print at about 50c cost


Look up some of the print in place fidget toys. There would actually be no way to make these any other way. 


Printed compliant mechanisms are also incredibly tactile. 


Shop now at Mighty Ape (affiliate link).
SepticSceptic
2263 posts

Uber Geek
+1 received by user: 779

Trusted

  #3383807 13-Jun-2025 22:45
Send private message

richms:


SepticSceptic:


I have an old CubePro for occasional use, certainly doesn't do the quality prints as you have made.


Try some newer filaments. My old crealities do so much better with less stringing and blobs when I got thru my old first lot of bulk bought PLA onto some newer PLA+ stuff.


I think the Cubepro is getting on to be at least 10yo tech, no longer supported, and to top it off, had a filament cartridge system that measures how much filament is used, and not easily resettable or refillable. 


Thankfully I have about 30 cartridges of PLA  and ABS on hand in various colours. 


And had a proprietary slicer.  


Paul1977
5171 posts

Uber Geek
+1 received by user: 2192


  #3383854 14-Jun-2025 09:43
Send private message

Biggest issue I'm have is scarring from support removal.


Using a different support interface filament to the main print isn't a realistic option most of the time because of the copious amount of wasted filament this produces, not to mention the massive increase in print time (unless you're fortunate enough to have an expensive dual nozzle printer like the H2D, which I don't).


Googling hasn't been very helpful, because everyone has a different recommendation; and they all come with a caveat along the lines of "you'll need different settings to this recommendation depending the model you're printing, filament type, layer height, nozzle size, and a thousand other factors".


What does everyone do here for making supports as easy to removal as possible and leaving minimal scarring? And then how to best clean up any scarring that is left? I'm talking mainly PLA variants.


Thanks


richms
29114 posts

Uber Geek
+1 received by user: 10229

Trusted
Lifetime subscriber

  #3383856 14-Jun-2025 10:15
Send private message

I just sand where the support was on things, but I am filling and painting everything that I print other than functional stuff that I dont care about appearance of so a few pock marks dont bother me.


Richard rich.ms

Paul1977
5171 posts

Uber Geek
+1 received by user: 2192


  #3383858 14-Jun-2025 10:57
Send private message

richms:


I just sand where the support was on things, but I am filling and painting everything that I print other than functional stuff that I dont care about appearance of so a few pock marks dont bother me.


I’m not overly concerned with functional stuff either, it’s the decorative stuff that often has large quantities of tree supports attached all over that present the problem.


I’m not looking to paint them, and sanding can leave it looking worse because it ends up quite white where you sand. I’ve read careful use of a heat gun or hair dryer after sanding can soften the PLA enough to restore the colour, so might try that (don’t have a heat gun, so it will be hair dryer).


But some models can be very intricate and fiddly, so don’t know how I could sand certain parts.


Maybe need to get a more controllable knife than the box cutter I have to tidy up after removing supports.


1 | 2 | 3 | 4 | 5 | 6 | 7 | 8 | ... | 10
View this topic in a long page with up to 500 replies per page Create new topic


Geekzone Live »

Try automatic live updates from Geekzone directly in your browser, without refreshing the page, with Geekzone Live now.


Are you subscribed to our RSS feed? You can download the latest headlines and summaries from our stories directly to your computer or smartphone by using a feed reader.