Geekzone: technology news, blogs, forums
Guest
Welcome Guest.
You haven't logged in yet. If you don't have an account you can register now.


Filter this topic showing only the reply marked as answer View this topic in a long page with up to 500 replies per page Create new topic
1 | ... | 5 | 6 | 7 | 8 | 9 | 10 | 11
timbosan

2199 posts

Uber Geek
+1 received by user: 294

Subscriber

  #3292617 3-Oct-2024 19:50
Send private message

tweake:


timbosan:


Hey all, restarting this thread.  Since I last posted the house has been re-piled (not all, just the places it needed) and I am back to sorting out other problems, including the ground sheet.

But a more pressing need has come up.  I have a quote for Insulmax, and keen to proceed, but the front of the house (the low part in the photos) has hardboard on the interior walls.  Due to poor drainage in the past the house has sunk a bit in one corner at the front, now that is fixed, but the hardboard is buckling in areas and parts have been patched in the past by previous owners where it split, but they just put more hardboard over the holes they cutout.

So I want to strip the hardboard and replace with gib before the Insulmax is done.  My plan is to remove skirting and architraves but cut around windows (I don't really want to ruin and redo the windows and they have enough depth to them that I can get away with this plan).  Also adding a layer of gib over the ceiling covering the existing "softboard" stuff.

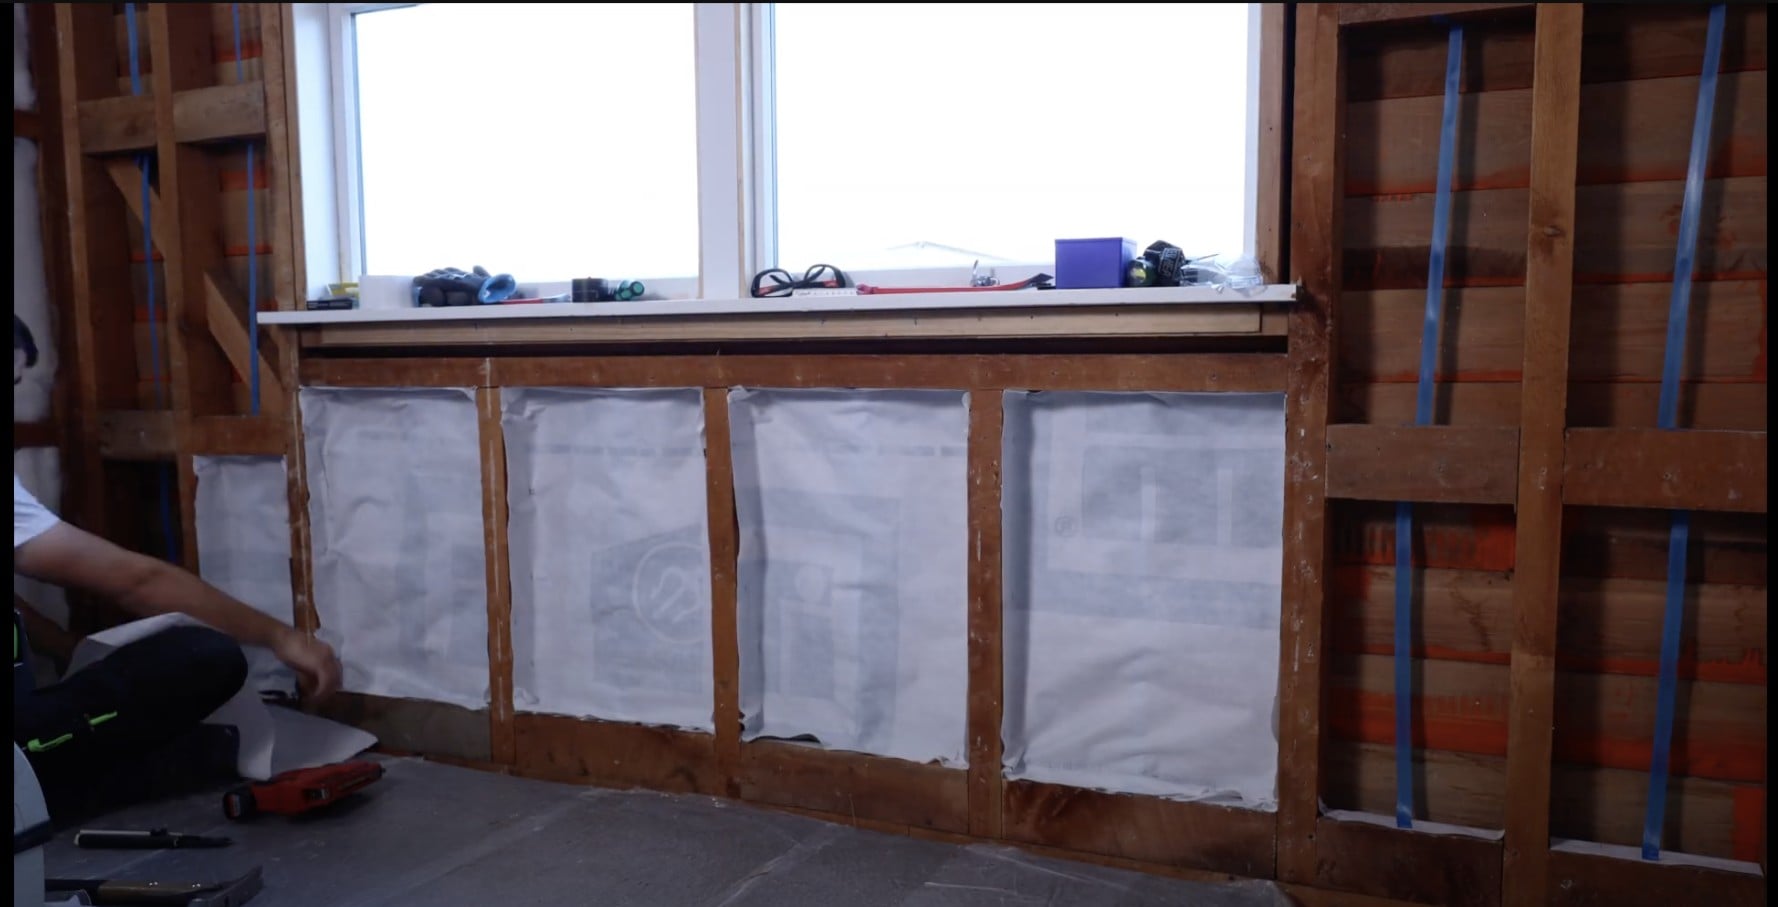
However, I am wondering if I need to install a vapour control barrier before I gib, something like this https://5merchants.co.nz/product/majrex-1-5m-x-50m/.  There is no building paper between the weatherboards and studs and the room is the coldest (skillion roof and lack of underfloor insulation).

Is this a good idea?  I can add Marjex to all the walls and seal the top and bottom edges to the floor / ceiling before adding back skirting etc.

Background - I have a goal to follow EnerPHit principles as possible, without taking the house back to the framing.   This is the kind of thing I am looking to do https://www.youtube.com/watch?v=FXXgjvOJcYI 


ideally strip back to studs, pocket install house wrap then insulate and gib. pointless gibbing then installing insulmax. i do not recommend drilling holes through the cladding to pump insulation in, especially removing the drainage plane. i think branz has dropped their support for these types of products.


installing a smart vapor barrier is good, it does help reduce in wall condensation (see branz testing).  however does the rest of the house follow  EnerPHit principles? otherwise its a lot of cost for very little gain. if you want to make it air tight you really need to remove the cladding, fit sheathing/rigid air barrier, so outside air cannot get in around the insulation. don't forget the windows and doors. on house that old typically the flooring is a major source of air leakage.


the smart vapor barrier is not a replacement for the lack of building paper/house wrap under the cladding. two very different jobs.


Hi, I totally agree, however I live in the house and stripping back to studs (and the rework needed to increase wall thickness, etc.) is just way too much.  So I am going with the changes I can make, when work is done.  The rest of the house doesn't follow EnerPHit, but over time I will do what I can to aim for that as a goal.  We already have double glazing (retrofit so keeping the wooden frames).

"on house that old typically the flooring is a major source of air leakage." This is something I have become increasingly aware of.  There is underfloor insulation over most of the house but it's only R1.5 (from memory) and parts are now missing from the re-piling.  My plan is to replace it all with R3 - which does fit - then a membrane of some sort to stop drafts.

the smart vapor barrier is not a replacement for the lack of building paper/house wrap under the cladding. two very different jobs. - Yup :-) this is specifically the INTERIOR membrane, I am using standard building paper for the downstairs (just storage) and recladding to remove the old vertical slats that let though a huge amount of aid, which along with the wooden floors makes it harder to heat.

do not recommend drilling holes through the cladding to pump insulation in - I thought Insulmax was generally well accepted?  All I can find from Branz is https://www.branz.co.nz/shop/catalogue/bk176-good-repair-guide-retrofitting-wall-insulation_671/ but I found this from 2013 https://www.buildmagazine.org.nz/assets/PDF/Build-136-36-Build-Right-Retrofitting-blown-in-wall-insulation.pdf which does raise some good points.  But what other options are there?


tweake
2647 posts

Uber Geek
+1 received by user: 1139


  #3292621 3-Oct-2024 20:00
Send private message

timbosan:


Hi, I totally agree, however I live in the house and stripping back to studs (and the rework needed to increase wall thickness, etc.) is just way too much.  So I am going with the changes I can make, when work is done.  The rest of the house doesn't follow EnerPHit, but over time I will do what I can to aim for that as a goal.  We already have double glazing (retrofit so keeping the wooden frames).

"on house that old typically the flooring is a major source of air leakage." This is something I have become increasingly aware of.  There is underfloor insulation over most of the house but it's only R1.5 (from memory) and parts are now missing from the re-piling.  My plan is to replace it all with R3 - which does fit - then a membrane of some sort to stop drafts.

the smart vapor barrier is not a replacement for the lack of building paper/house wrap under the cladding. two very different jobs. - Yup :-) this is specifically the INTERIOR membrane, I am using standard building paper for the downstairs (just storage) and recladding to remove the old vertical slats that let though a huge amount of aid, which along with the wooden floors makes it harder to heat.

do not recommend drilling holes through the cladding to pump insulation in - I thought Insulmax was generally well accepted?  All I can find from Branz is https://www.branz.co.nz/shop/catalogue/bk176-good-repair-guide-retrofitting-wall-insulation_671/ but I found this from 2013 https://www.buildmagazine.org.nz/assets/PDF/Build-136-36-Build-Right-Retrofitting-blown-in-wall-insulation.pdf which does raise some good points.  But what other options are there?


in that case i would not bother with trying to do it like passive house. you either do all or nothing. each part has to work in with the rest. doing one part increases the cost with little gain. gib will air seal okish.


the floor i would wait a few years after ground barrier (floor will dry out and open up) then look at sealing. your never going to get a membrane to air seal on that sort of timber.


the best way to insulate is to gut the walls. failing that put the insulmax in from the inside, don't drill holes through the cladding.


timbosan

2199 posts

Uber Geek
+1 received by user: 294

Subscriber

  #3295091 9-Oct-2024 17:15
Send private message

So having read the reply from @Tweake  many times, and the comment from @xyf about his work, I have changed plans.  Insulmax is on hold, since I am pulling the lining (hardboard) off the front rooms and replacing with Gib, I may as well insulate them from the inside.

Plans based on Scott Brown https://youtu.be/0oDLwBZurp8?t=199 - Building paper in each area, not touching the weatherboard, then insulation in each space, fitting snugly.

Any hints / feedback?


tweake
2647 posts

Uber Geek
+1 received by user: 1139


  #3295141 9-Oct-2024 17:27
Send private message

scotts way is excellent, but, if i remember right, hes adding 50mm to the wall depth. ie going from 4' to a 6" wall and having to extend windows etc. thats going above and beyond.


otherwise pocketing the house wrap is acceptable. that creates a small gap for water to run down and air to flow through for drying.


on an older house you may have slightly bigger framing, so the normal 90mm insulation leaves a bit of a gap anyway.


timbosan

2199 posts

Uber Geek
+1 received by user: 294

Subscriber

  #3295142 9-Oct-2024 17:41
Send private message

tweake:


scotts way is excellent, but, if i remember right, hes adding 50mm to the wall depth. ie going from 4' to a 6" wall and having to extend windows etc. thats going above and beyond.


otherwise pocketing the house wrap is acceptable. that creates a small gap for water to run down and air to flow through for drying.


on an older house you may have slightly bigger framing, so the normal 90mm insulation leaves a bit of a gap anyway.


Correct - later on he adds (I think) 40x25 vertical timber and fills that with another layer.  I am not doing that on the walls with the windows / doors (too much work to resize the window depth) but I am planning it on the 1 blank wall, I mean why not, its just my time and a good learning experience.  I was going to double layer 13mm Gib as well on that wall as well https://www.reddit.com/r/diynz/comments/ilgpvu/i_made_a_table_of_gib_noise_control_systems_and/ 

I know you may not agree @tweake but I am still going with the interior vapour barrier.  I am not going to re-Gib that room ever, so may as well do it whilst I can :-) 


Stu1
1892 posts

Uber Geek
+1 received by user: 489

ID Verified
Subscriber

  #3295143 9-Oct-2024 17:45
Send private message

I would suggest using  expanding foam around the windows to full any gaps 


Shop now for Dyson appliances (affiliate link).
timbosan

2199 posts

Uber Geek
+1 received by user: 294

Subscriber

  #3295144 9-Oct-2024 17:47
Send private message

Stu1:


I would suggest using  expanding foam around the windows to full those gaps 


Good idea! I just re-watched parts of the Scott Brown video and that's one thing he does as well.  Close as many gaps as possible.


tweake
2647 posts

Uber Geek
+1 received by user: 1139


  #3295145 9-Oct-2024 17:48
Send private message

timbosan:

Correct - later on he adds (I think) 40x25 vertical timber and fills that with another layer.  I am not doing that on the walls with the windows / doors (too much work to resize the window depth) but I am planning it on the 1 blank wall, I mean why not, its just my time and a good learning experience.  I was going to double layer 13mm Gib as well on that wall as well https://www.reddit.com/r/diynz/comments/ilgpvu/i_made_a_table_of_gib_noise_control_systems_and/ 

I know you may not agree @tweake but I am still going with the interior vapour barrier.  I am not going to re-Gib that room ever, so may as well do it whilst I can :-) 


yes, so you can pocket install it and push the house wrap up against the cladding, where scott had a sizeable gap (hence the added bit of timber).


smart membrane is useful (it reduces condensation inside the walls), tad expensive but cost is up to you. its simply not to expect the house to be airtight by fitting it.


tweake
2647 posts

Uber Geek
+1 received by user: 1139


  #3295147 9-Oct-2024 17:52
Send private message

timbosan:


Stu1:


I would suggest using  expanding foam around the windows to full those gaps 


Good idea! I just re-watched parts of the Scott Brown video and that's one thing he does as well.  Close as many gaps as possible.


make sure you get that right. the top and sides can be filled but the bottom needs to be left open for drainage. what they will often do is use backer rods pushed in all the way for the top and sides, then foamed. but at the bottom the backer rods is pushed in slightly then caulked. i'm a bit rusty on it but there is sites around explaining it. i think "the build show" utube has a video on it.


gzt

gzt
18689 posts

Uber Geek
+1 received by user: 7828

Lifetime subscriber

  #3295151 9-Oct-2024 18:20
Send private message

Building paper in each area, not touching the weatherboard, then insulation in each space, fitting snugly.


That photo is strange to me. Any moisture running down the vapor barrier will end up on the bottom nog surely?


then, snugly is going to push the vapor barrier against the weatherboards? unless it won't.


I'm not saying it won't be a living improvement ;  )


I'm thinking it will look odd to a building inspector.


I guess the idea is to provide a vapor barrier while continuing to allow air movement forward of the vapor barrier to hopefully continue venting from any existing air movement.


tweake
2647 posts

Uber Geek
+1 received by user: 1139


  #3295154 9-Oct-2024 18:53
Send private message

gzt:


That photo is strange to me. Any moisture running down the vapor barrier will end up on the bottom nog surely?


then, snugly is going to push the vapor barrier against the weatherboards? unless it won't.


I'm not saying it won't be a living improvement ;  )


I'm thinking it will look odd to a building inspector.


I guess the idea is to provide a vapor barrier while continuing to allow air movement forward of the vapor barrier to hopefully continue venting from any existing air movement.


this one is a little odd because it has that nog sitting on top of the bottom plate. but i think he has another bit of house wrap on the bottom there. 


also normally water does tend to sit on the bottom plate until it dries. any large amount tends to drain out between the bottom plate and cladding. the house wrap is really there to keep the insulation dry, not the timber.


Shop now at Mighty Ape (affiliate link).

xyf

xyf
301 posts

Ultimate Geek
+1 received by user: 44


  #3295160 9-Oct-2024 19:50
Send private message

Ultimately we live in south south auckland. In 20 years climate change will make this like the tropics so we will be more worried about keeping our 120+ year old houses cool 😎

I feel like my remu framing could sit untreated in water for another 120 years. The beauty of old houses

Handle9
11927 posts

Uber Geek
+1 received by user: 9683

Trusted
Lifetime subscriber

  #3295190 9-Oct-2024 22:40
Send private message

gzt:

Building paper in each area, not touching the weatherboard, then insulation in each space, fitting snugly.


That photo is strange to me. Any moisture running down the vapor barrier will end up on the bottom nog surely?


then, snugly is going to push the vapor barrier against the weatherboards? unless it won't.


I'm not saying it won't be a living improvement ;  )


I'm thinking it will look odd to a building inspector.


I guess the idea is to provide a vapor barrier while continuing to allow air movement forward of the vapor barrier to hopefully continue venting from any existing air movement.


It’s an acceptable method under NZS4246:2016. Any building inspector who is qualified will understand what is being done.

elpenguino
3577 posts

Uber Geek
+1 received by user: 2939


  #3295237 9-Oct-2024 22:49
Send private message

tweake:


make sure you get that right. the top and sides can be filled but the bottom needs to be left open for drainage. what they will often do is use backer rods pushed in all the way for the top and sides, then foamed. but at the bottom the backer rods is pushed in slightly then caulked. i'm a bit rusty on it but there is sites around explaining it. i think "the build show" utube has a video on it.


That's right. You get this type of stuff, in the thickness you need for your gap and squash it into the gap, pushing it no more than a third of the way in. Any moisture will collect on the 'outside' of the rod and be free to evaporate later.


https://www.placemakers.co.nz/online/adhesives-sealants/adhesives-sealants/foam-products/expansion-joint-fillers/pef-backing-rod-25mm-x-50m-roll-white/p/4410718


Expanding foam is needed where the floor meets the walls too.


Most of the posters in this thread are just like chimpanzees on MDMA, full of feelings of bonhomie, joy, and optimism. Fred99 8/4/21


timbosan

2199 posts

Uber Geek
+1 received by user: 294

Subscriber

  #3295301 10-Oct-2024 08:19
Send private message

elpenguino:


tweake:


make sure you get that right. the top and sides can be filled but the bottom needs to be left open for drainage. what they will often do is use backer rods pushed in all the way for the top and sides, then foamed. but at the bottom the backer rods is pushed in slightly then caulked. i'm a bit rusty on it but there is sites around explaining it. i think "the build show" utube has a video on it.


That's right. You get this type of stuff, in the thickness you need for your gap and squash it into the gap, pushing it no more than a third of the way in. Any moisture will collect on the 'outside' of the rod and be free to evaporate later.


https://www.placemakers.co.nz/online/adhesives-sealants/adhesives-sealants/foam-products/expansion-joint-fillers/pef-backing-rod-25mm-x-50m-roll-white/p/4410718


Expanding foam is needed where the floor meets the walls too.


A question related to this - I have heard that sometimes, people don't remove the trim around the windows (or even the skirting / architraves) and just pull off the wallboard and gib up the edges.  I am removing skirting / architraves, but in two minds about the windows.  (this is from someone who did work on state houses and to reduce costs, they didn't remove any trim).

Is it bad to just leave the trim in place and cut the wallboard where the trim ends?


1 | ... | 5 | 6 | 7 | 8 | 9 | 10 | 11
Filter this topic showing only the reply marked as answer View this topic in a long page with up to 500 replies per page Create new topic


Geekzone Live »

Try automatic live updates from Geekzone directly in your browser, without refreshing the page, with Geekzone Live now.


Are you subscribed to our RSS feed? You can download the latest headlines and summaries from our stories directly to your computer or smartphone by using a feed reader.