

The absolute noobs guide to VPN (by a noob)
The purpose of this how-to is to describe how to set up a Virtual Private Network ("VPN") server as a secure gateway into a home network. Virtually every home router has a firewall built in that keeps internet undesirables out of your home network. But sometimes you want access to your home network from outside; one of the most common reasons is accessing security/CCTV footage. Increasingly, people also want to control other aspects of their smart home/IOT such as heating, alarms, garage doors and sprinklers. You can open up your router's firewall to let you in to your home network, most commonly by "port forwarding" in your router. For example, your CCTV manual might instruct you to forward port 37777 to 192.168.1.199, the IP address of your camera or NVR on your home network. But by port forwarding, your home network is now only as secure as the software on the camera.
"No, I'm okay, my camera has a password that is 22 characters long. It will take someone eleventy bajillion years to guess all the combinations".
If you port forward, the only thing acting as a barrier between your home network and the internet's most reputable citizens is the security of the software on that camera or NVR. No-one is going to try and brute force your CCTV password. Instead, they will use exploits and vulnerabilities to get around the entire log-on process. Even if the software on your camera is secure the day you buy it (protip: this will almost certainly be false if you buy a cheap camera), you can virtually guarantee won't be kept up to date over its lifetime unless you are paying for some kind of ongoing support:
"My camera points outside. I don't care if someone is viewing it."
The internet is rife with unsecure CCTV feeds. You certainly don't want your bedroom camera online (though why anyone would have a security camera in their bedroom is beyond me). But you may not care about your driveway. The problem doesn't stop with privacy breaches though. A compromised camera can be used as a beachhead into the rest of your network. But by far the biggest problem is the possibility of your camera being taken over and used as part of a botnet making DDOS attacks (i.e. the internet worse for everyone).
Accessing CCTV + other smart home stuff securely
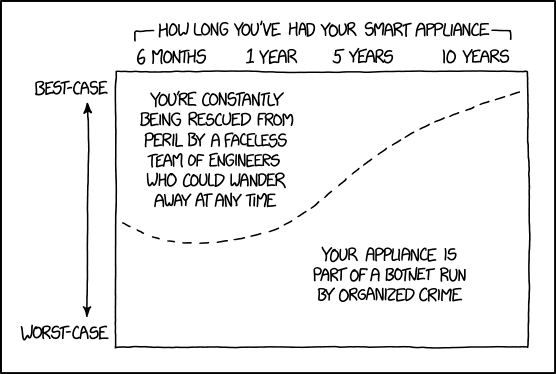
One way to securely remote access your home network is to use a VPN server. Instead of opening up your camera to the internet, you use a VPN server as the gatekeeper. You have to pass the VPN server before getting to the camera. While a VPN server could be subject to vulnerabilities and exploits, it is much less likely. Most significantly, it is special purpose software that is used by thousands worldwide and frequently updated. This guide uses OpenVPN, which is open source software, so anyone is free to examine the code for vulnerabilities. And unlike the XKCD cartoon above, if the engineers maintaining it did wander away, the open source community can take over the code maintenance.
VPNs are not the only way of securely access your home network. But uncontrolled port forwarding is certainly not one of them. If you don't already know about one of these other ways to securely access your home network, and you want to be able to remotely view your CCTV cameras or other smart home stuff, you should use a VPN. They are cheap, easy and secure. And you might learn something new setting one up.
One of the big advantages of a VPN is that while your VPN is connected, your phone/other device looks just like it was connected to your wifi network. Apps and websites that work while your connected to your wifi will work just the same while connected to your VPN!
Oh, I’ve got [fancy router] that includes a VPN. I’ll just use that.
If you know what you’re doing, great! If you’re not quite sure what you’re doing, I would strongly recommend testing stuff on systems that won’t cause issues/familial complaints if they break. I wouldn’t start testing on a router or other critical device unless you have another router that you can substitute if you really muck something up.
Tools required:
Windows PC (I will try and do the instructions for Mac too at some stage. If you want to help out with the necessary how-to for a Mac feel free to chime in. If you run Linux, you almost certainly already know how to do all this and don’t need instructions).
Single board computer e.g. Raspberry Pi, Odroid
Memory card for single board computer (8GB recommended min)
Way of plugging in memory card to your PC (e.g. MicroSD --> USB adapter)
Ethernet cable
USB keyboard
Monitor/TV that can connect to single board computer + necessary cables/adapters
Internet connection
Preparation time: 1-2 hours
Cooking time: 10 minutes, all going to plan.
This guide consists of two parts. The first describes how to set up Linux on a single board computer ("SBC") like a Raspberry Pi and make it pretty secure against the world. The second part describes how to install and configure OpenVPN on your SBC and access it remotely from a phone or notebook.
As a newbie to Linux, I find SBCs to be a great learning tool. As well as being cheap, the consequences of stuffing something up are minimal. You aren't mucking around with your main system or your router, they shouldn't have any important files on them (at least to start) and absolute worst-case scenario is reflashing the memory card and starting again.
If you are buying a new SBC to do this, Raspberry Pis are a good inexpensive option (<$100 new). They frequently pop up for less than this in the For Sale Forum. However, their biggest plus is that they are the most common and it is very likely that someone else has had your problem previously and you can sort out your issues with a google search. Other options might be a bit more powerful, but aren’t so common.
Want to buy new? I’d recommend the team at nicegear.co.nz – they are super helpful and @hads has been known to pop up in this parish from time-to-time. A case is a very good idea too.
This can also be done on an old laptop or PC if you would prefer to experiment that way.
PART 1: PREPARATION: SINGLE BOARD COMPUTER ESSENTIALS
1. From your Windows PC, download the latest version of Raspbian (for Raspberry Pis) or Ubuntu (most other SBCs I've come across) for your SBC. If in doubt, consult google for your model. "Minimal", "lite" or "server" versions are fine for these purposes, and are smaller so will download faster. If using a Raspberry Pi, you can also use the NOOBS (new out of the box software) operating system installer.
If you have options, you ideally want "Debian Stretch" or "Ubuntu 18/Bionic Beaver".
2. Unzip the OS you downloaded. It should end with an ".iso" or ".img" suffix.
3. Plug your memory card into your PC. I did this via a cheap MicroUSB adapter that came free with the memory card, but your notebook or PC may include a slot for this. Windows may prompt you to format the disk. If so, a quick format is fine.
4. Flash the OS to the memory card. I use Rufus for this, which works well, is lightweight and doesn't require full installation. Etcher is another option that I've heard recommended, but not used myself.
To use Rufus, ensure that your memory card is listed in the Device section. Then find the option that reads Create a bootable disk using... and click on the drive/CD button, and browse to your downloaded and unzipped OS. Rufus expects an .iso file but also works with .img, but you need to change to All files in the bottom right hand corner. With your memory card and OS selected, Rufus will complete the other options automatically. Click Start.
I have occasionally had errors at this step; clicking Start again has always resolved these for me.
5. Eject the memory card and insert it into to SBC. Plug in a keyboard and monitor (or TV) to your SBC. Ideally you also want to plug in your SBC to your router with an ethernet cable, but this might not be possible if your router and monitor or TV are not convenient. You can skip the ethernet if required. Then power up the SBC.
6A. If you are using NOOBS, follow the prompts as required. You want to install Raspian Lite, set your time zone to New Zealand, and allow SSH access. Otherwise the default options are usually fine. The default credentials are "pi"/"raspberry". Skip ahead to step 7.
6B. For all other SBCs and OSes, you should eventually be presented with a black screen and white text:

Welcome to Bash! This is the command line interface for Linux. It looks imposing, but (a) it is actually much easier typing commands correctly than clicking through a series of six different icons and toggling 13 settings to achieve something; and (b) makes you feel like a total cyberhacker.
You can now log in to Bash. The credentials for various OSes will vary by OS and SBC. I did this with an Odroid C1 running Ubuntu 18; the default credentials for that are "root"/"odroid". For most flavours of Raspberry Pi, the default credentials are "pi"/"raspberry".
Common troubleshooting: You might not see anything on your monitor. After checking cables etc., just power cycle your SBC. Sometimes the HDMI autodetect doesn't work properly on the first boot.
7. You are currently logged in as "root", the Linux superuser. First of all, let’s change the default password for the root user. Type:
passwd
Then your new password at the prompts. You won’t use this password much, so keep a record of it somewhere.
Best practice/the internet says that you should generally avoid using the root user, so let's set up a new user account. Type the following and press enter. You can substitute your name as appropriate:
adduser mdf
You will be presented with some stuff to fill out. I tend to ignore most of this (just press enter to skip), but you do need a password. You will type this a bit so make it something memorable, but it doesn't need to be super-duper secure.
Now give your new user additional privileges:
usermod -aG sudo mdf
User mdf can now run elevated or root commands by preceding them with the command "sudo". Any time Bash throws an error about not being allowed or have the privileges to do something, run your previous command preceded by "sudo". Protip: the up and down arrows on your keyboard will scroll through previous commands you've typed. Super helpful for correcting typos or adding sudo.
Now switch users to your new user:
su - mdf
You will be prompted for your password.
You can tell which user is logged on at the start of the Bash prompt. Also, root users will see a hash (#), normal users a dollar sign (S).
8A: It's a pain having your SBC plugged in to your TV with a long ethernet cable snaking off in to the distance. So let's make life a bit easier by making sure you can finish setting your SBC up remotely from your PC. Start by ensuring SSH (secure shell) is installed and running. Type:
sudo systemctl status ssh
You will get a few lines of text, hopefully including a line that says:
Active: active (running)
This is usually in green in most recent OSes.
If you are active, skip to 9.
8B: If you are not active, but don't have other errors, you should be able to start the SSH daemon with:
sudo systemctl start sshd
8C: If you have errors (to the effect of "service not found"), you will need to install SSH. This requires an internet connection. Type (enter after each line):
sudo apt update
sudo apt install openssh-server
Hit Y or enter when prompted to install.
Once done, go back to 8A and repeat.
Note on passwords: The first time you run a "sudo" command you will be prompted for your password again, but only the first time. Subsequent sudo commands should not require a password.
9A: If your SBC is not already connected to your home network, power down your SBC with:
sudo shutdown now
Remove the keyboard and monitor, and plug your SBC into one of the LAN ports on your router using an ethernet cable and power it back on. Skip ahead to step 10.
9B: If your SBC is already connected to your home network, it's helpful to grab it's IP address now. Type:
ip a
If that doesn't work, use the older:
ifconfig
You should get several lines of text. You are looking for something that says "192.168.1.100" or "10.1.1.100" or similar. This is usually under "eth0". Make a note of this.
10: You now need the IP address of your router. If you already know how to do this or have its IP address, skip ahead to 11. Otherwise return to your Windows PC or notebook and hold down the Windows key and press "r" (i.e. you should simultaneously be holding down the windows key and r). Type "cmd" into the box that appears and press enter. You will get another black screen that looks like the Bash screen. Type:
ipconfig
You are looking for the lines that reads
Default Gateway . . . . . . . . XX.XX.XX.XX
The XX's will be the IP address of your PC and router. For most home routers, this will be something like 192.168.1.1 for the router.
You can close the black screen/command prompt that appeared.
11A: On your Windows PC, open a web browser and type in the IP address of your router (that you have from step 10) and log on. The default credentials will vary depending on your model and ISP. Google your ISP and router model number if you're not sure.
11B: If you already have your SBC's IP address from step 9B, you can skip ahead to 11C. If you don't already have your SBC's IP address, you will need to find a screen labelled "home network", "DHCP", "LAN" or similar. This should have a list of all devices connected to your network and their IP address (you might need to hover or click to find the IP address). You are looking for an entry that indicates your SBC (e.g. "pi", "odroid" or "ubuntu"). If you are not sure, note down all possibilities and skip to steps 12 and 13. Try each until you have some success like anticipated in step 13. Don't worry, you won't break anything if you try and fail with other devices. Once you've figured out your SBC's IP address, return for step 11C.
11C: Most home networks use something called DHCP to assign IP addresses to devices on your home network. If your router is reset, there is a chance that your SBC could be assigned a different IP address to the one you're currently using. You can make this IP address predictable in one of two ways - (1) assigning a static IP on your SBC (but this isn't super straightforward) or (2) "reserving" the IP address to that particular device. Almost all routers support reserving IP addresses. The process for this varies by router, but there are two general approaches. Some routers have a list of all devices in a screen labelled "home network", "DHCP", "LAN" or similar (the list described in 11B). If you have an option in that list to "map" or "reserve" an IP, click that option for your SBC and follow the prompts. The other major approach will have a section or screen labelled "Static IP", "Static Address", "DHCP reservation" or similar in your DHCP or LAN settings. Create a new entry using your device name and its current IP address. If you are stuck, you may need to google your router model and "map static ip" or "reserve static ip".
Optional: If know how to change your SBC's IP address on your router and want something more memorable, now is a good time to do that. You will need to power cycle your SBC afterwards. You can also set a static IP from your SBC, but that is beyond the scope of this how-to. Google your particular Linux distribution and "set static IP".
12: On your Windows PC, download and install PuTTY. PuTTY is a set of tools to let you manage your SBC (and other types of server) from your Windows PC.
13. From Windows, open PuTTY (putty.exe). In the main scree, type your SBC's IP address into the box labelled "Host Name (or IP address)". You should have this from step 11 and will be something like 192.168.1.100. Then click Open. You will be prompted with a warning screen to the effect of “You haven’t connected to this device before, we’re not sure about its certificate, and it might be insecure. Are you sure you want to continue? Click Yes to proceed. All going to plan, you should see a black Bash screen asking you to log in to your SBC just like in step 6.
You can obviously type directly in to PuTTY, just like Bash. However, PuTTY also lets you copy commands between your Windows PC and SBC. However, PuTTY does not use the common control+c/control+v. Instead, highlighting text inside PuTTY with the mouse will copy it automatically. Right clicking the mouse will paste.
So you can copy commands from this tutorial into PuTTY by highlighting and pressing control+c (Windows) and then right clicking inside PuTTY.
14. Log in to your SBC via PuTTY using the user name and credentials you set up earlier (e.g. "mdf"/"password", not "root"/"odroid" nor "pi"/"raspberry"). If you can successfully access your SBC via PuTTY you can now disconnect your SBC from the monitor and keyboard if you have not already done so.
15. If you have not already done so (e.g. during the NOOBs prompts), start by setting the time zone correctly (strange problems can arise from something as simple as having the wrong time on your SBC):
For Raspberry Pis, type:
raspi-config
For Ubuntu / other SBCs, type:
sudo dpkg-reconfigure tzdata
In both cases, then follow the prompts and select the right time zone (likely Pacific Ocean/Auckland if you are on Geekzone).
16. Now update your SBC. Type or paste (one at a time, pressing enter, and answering yes to the prompts). Some of these may take a while to run:
sudo apt update && sudo apt upgrade
sudo apt dist-upgrade
sudo apt autoremove
sudo apt clean
Note: "apt" is the most recent tool for package management on the latest Debian and Ubuntu systems. If you are running an older version, you may need to substitute all references to "apt" to "apt-get".
I would strongly recommend rebooting at this stage:
sudo reboot
This will close your PuTTY session and you will need to re-open a new session, using the same instructions as at 13.
17. Optional, but recommended. Prevent logging on as root using SSH by typing/pasting:
sudo nano /etc/ssh/sshd_config
Find the line that reads "PermitRootLogin" and change "yes" to "no". Press control+x to exit, then y to save and enter to select the existing file name. Then type:
sudo systemctl reload sshd
18. Ensure that no-one can access your SBC via SSH (the protocol that PuTTY uses) by configuring UFW ("uncomplicated firewall").
Check whether UFW is installed by typing:
sudo ufw status
If you get a positive response, skip the next line. Otherwise, if you get an error, install UFW by typing
sudo apt install ufw
Configure the firewall defaults by typing the following (i.e. allow traffic out, deny traffic in):
sudo ufw default allow outgoing
sudo ufw default deny incoming
Then allow access into the SBC via SSH (aka port 22) but only from your home network by typing the following. Do not skip this step!
sudo ufw allow from XX.XX.XX.0/24 to any port 22
Substitute the "XX.XX.XX" bit for the first three numbers of your home network/router/PC's IP address, but make the fourth number "0" and follow with a "/24". For example, if your router is 192.168.1.1, then use 192.168.1.0/24.
Enable the firewall by typing the following. Don't do this step unless you are sure you have followed all the above steps.
sudo ufw enable
If you are booted out of PuTTY at this stage, you've done something wrong and will need to plug your SBC back into its monitor and keyboard and reconfigure. Reset UFW by typing the following then repeat this step:
sudo ufw disable
sudo ufw reset
If everything has gone well, nothing should have changed.
19. Ensure that you have Curl installed. Select yes if you have the option to install anything. If Curl is already installed and up-to-date, you won’t be prompted to do anything.
sudo apt install curl
You now have an up-to-date, secure Linux server running on your SBC that can only be configured remotely by you (well, from your home network). If you are planning on configuring a different application to run on your SBC, essentially you follow the same steps to this point. You can also check another item of the Geek Bucket List.
20A. If you already have a public static IP, you are done. Go to Part 2.
20B. If you do not already have a public static IP, you will need a Dynamic DNS service. There are lots available, but Duck DNS is free, and the steps are described below.
20B.1. Sign up with DuckDNS at www.duckdns.org and pick a domain name - e.g. mdfexample.duckdns.org
20B.2. Look at the install instructions at https://www.duckdns.org/install.jsp. If your router is listed, it is easiest to follow those instructions, then go to Part 2.
20B.3 If your router is not listed, install the DuckDNS script on your SBC by typing the following (one at a time):
mkdir duckdns
cd duckdns
nano duckdns.sh
You will be in an editing window. Paste the following (spaces and case matter), changing the domain to the one you signed up with, and the token to the one on your account screen. You don't need the duckdns.org bit of your domain name, just the "mdfexample" bit. You can also get these in the https://www.duckdns.org/install.jsp page if you are logged in.
echo url="https://www.duckdns.org/update?domains=mdfexample&token=a7c4d0ad-114e-40ef-ba1d-d217904a50f2&ip=" | curl -k -o ~/duckdns/duckdns.log -K -
Press control+x to exit then Y to save and enter to select the existing file name.
Type/paste (one at a time):
chmod 700 duckdns.sh
export VISUAL=nano; crontab -e
Paste the following at the very end of the screen that pops up:
*/5 * * * * ~/duckdns/duckdns.sh >/dev/null 2>&1
Press control+x to exit then Y to save and enter to select the existing file name.
Type:
./duckdns.sh
If everything is set up correctly, you will get no errors. You can also check the logfile (which hopefully simply says “OK”) by typing:
nano duckdns.log
Then control+x to exit.
That’s the prep done, you can finally proceed to actually setting up your VPN.
PART 2: COOKING TIME: ACTUALLY SETTING UP THE VPN
1. Log into your SBC using PuTTY.
2. PiVPN is a script that has done almost all the hard work of installing OpenVPN for you (although labelled PiVPN, it works on other SBCs). To run, type/paste:
curl -L https://install.pivpn.io | bash
You will be guided through almost all steps of the installation process. You may be prompted at times for your password.
There are several prompts that you simply need to hit OK (use enter) for. If you need to toggle a selection, use the arrow keys and space, then enter. But for most options the default selection is fine:
- Yes, use the current IP
- No, you don’t need to configure a static IP despite the warnings (so long as you did everything at step 11)
- Use the user you created in step 7 (for me, mdf)
- Yes, enable unattended upgrades
- Yes, use the UDP protocol
- Use port 1194
- Use 2048-bit encryption (recommended level)
- If you have a static IP, use that. If not, you need to use your duckdns (or other Dynamic DNS service you signed up at the end of Part 1 – e.g. mdfexample.duckdns.org)
- Use Google DNS for your VPN clients (you can change this if you know why you would change this)
- Reboot when done.
The only tricky query is whether to use version 2.4 (current) of OpenVPN or not. If you are running a recent OS on your SBC such as Ubuntu 18 or Debian Stretch, you should choose 2.4 (yes). Otherwise choose no.
3. Forward the OpenDNS port from your router to your SBC. Log into your router using a web browser and the IP address for your router from step 11 of Part 1. The steps required will vary depending on your router. If you are stuck, google your router model and some key words from the instructions. First find a section that is called "WAN", "Internet", "Port Forwarding", "Forwarding", "Port Mapping" or similar. Create a new entry for Port 1194 and map or assign it to the IP address of your SBC.
On some routers (e.g. the common HG659) you may need to add a new port mapping application first. The required details should be some combination of the following:
Name: OpenVPN
External Port: 1194 (if a range, 1194-1194)
Internal Port: 1194 (if a range, again 1194-1194)
Protocol: UDP
Make sure you save before exiting.
Wait, didn't you say port forwarding was bad? Sort of. Port forwarding to a (potentially) insecure device is itself insecure. But forwarding to a secure device, like your new correctly configured SBC is much more secure.
4. Set up your VPN users. Log back in to your SBC using PuTTY. Type:
sudo pivpn add
Enter a name and password. I would suggest using "yourname-yourdevice-date" (e.g. "mdf-phone-2019") to let you easily distinguish between VPN users (for example, delete just the specific entry for your phone if you change devices).
You will get a success message telling you that mdf-phone-2019.ovpn was copied to a directory (something like /home/mdf/ovpns). This is your configuration file and includes a "certificate" (a very complex code used as party of security). You copy a certificate to your device. This turns that device (and any device with a copy - use care) into a form of two factor authentication. Using a certificate + password will let you log on to your VPN.
If required, repeat this step for each additional user and device.
5. Copy your .ovpn configuration to your device. This can be done a few ways. I find it easiest to copy the file to my desktop then to my phone, but you could also copy it to a NAS or other shared device.
If copying to your PC, we’re going to use another of the PuTTY tools called “pscp.exe” (PuTTY secure copy). On your Windows PC, open a command prompt by pressing windows+r then typing "cmd" and enter. You need to be in the folder containing pscp.exe for this to work. In the CLI box that opens type:
cd c:\program files\putty
If you installed putty somewhere else, you will need to type your install folder here.
Then type:
pscp mdf@192.168.1.100:/home/mdf/ovpns/mdf-phone-2019.ovpn c:\users\mdf\documents
You will need to substitute the user name, the IP address, and the folder for your ovpn file for your particulars. You might need to fiddle a bit before you get it right. You can also change the destination folder to one that suits you. Complete any password prompts. Note that the slashes (/ and \) are in different directions for Linux systems (in this case the source) and Windows systems (destination).
Copy the .ovpn file to the device you are going to use. Ideally plug in your phone, but you can also use airdrop or dropbox or similar (note that anyone with a copy of your certificate and password can access your network so be careful).
6. Install "OpenVPN Connect" from your app store of choice:
Windows
Android
iPhone
In the app, add a new profile (the orange plus). Navigate to your ovpn file and click import.
7. Turn off wifi on your phone (depending on your router, you probably won't be able to log on to your VPN while you're connected to your router). Click on your new profile. After a few seconds, you should be connected to your new VPN! You should now be able to access any app or website (e.g. CCTV) from your phone, just like you could from your wifi. You can toggle your VPN on and off as you require.
PART 3: TROUBLESHOOTING
Hopefully this step isn’t required, but if you are having trouble:
1. Check the log files:
From the OpenVPN connect application, click the icon that looks a bit like a scroll with “<>” inside.
From PuTTY/your SBC, type:
sudo nano /var/log/openvpn.log
In each case, checking for obvious errors. Google your error text if necessary.
2. Reinstall PiVPN
First uninstall PiVPN. Type:
pivpn -u
Then reinstall PiVPN using the process in Part 2.
3. Check your OpenVPN version
PiVPN is a script that installs OpenVPN. OpenVPN version 2.4 only works on the most recent OS versions – Ubuntu 18 and Debian Stretch. If in doubt, first check the OpenVPN version that was installed by the PiVPN script:
openvpn --version
At the start of the response, you will see something that says either
[code]OpenVPN 2.4.XX]
Or
OpenVPN 2.3.10
If the latter, you either need to upgrade your OS (return to Part 1) or reinstall PiVPN using the older version of OpenVPN. To uninstall PiVPN:
pivpn -u
Then reinstall PiVPN using the process in Part 2, but when prompted whether to use version 2.4 (current) of OpenVPN, choose no.
4. Check your firewall
The PiVPN script should automatically configured the required components of UFW. But double check this by typing:
sudo ufw status verbose
You should see something like:
 To Action From
-- ------ ----
22 ALLOW IN 192.169.1.0/24
1194/udp ALLOW IN Anywhere
Anywhere ALLOW IN 10.8.0.0/24
1194/udp (v6) ALLOW IN Anywhere (v6)
If not, try re-installing PiVPN (see above).
Try restarting the firewall by typing the following:
sudo ufw reload


