Geekzone: technology news, blogs, forums
Guest
Welcome Guest.
You haven't logged in yet. If you don't have an account you can register now.


View this topic in a long page with up to 500 replies per page Create new topic
1 | 2 | 3 | 4 | 5 | 6 | 7 | 8 | 9 | 10
Paul1977
5188 posts

Uber Geek
+1 received by user: 2210


  #3391697 7-Jul-2025 13:58
Send private message

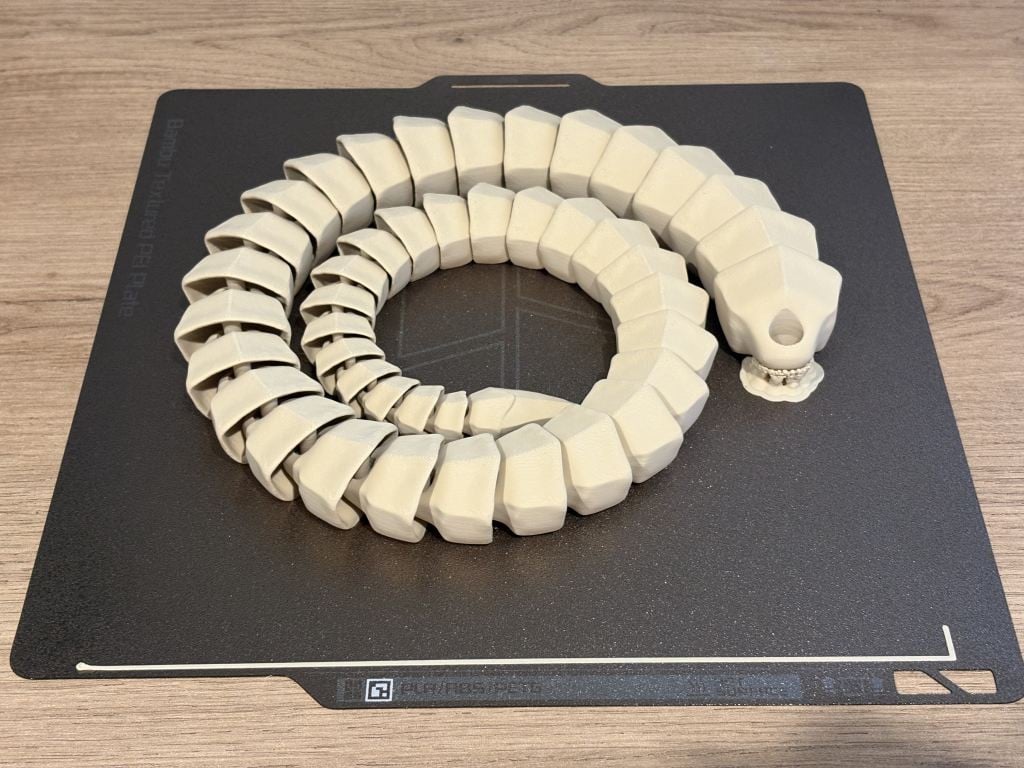
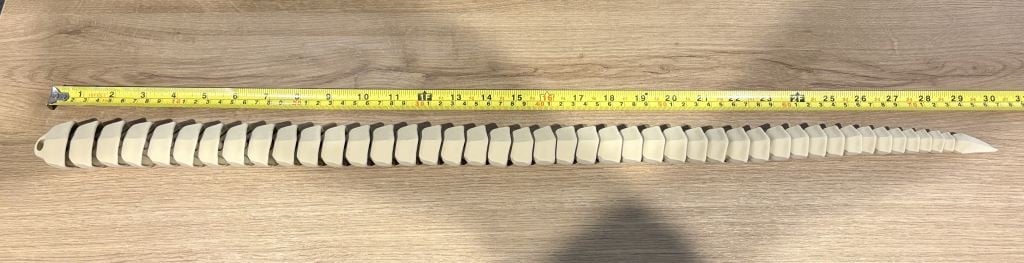
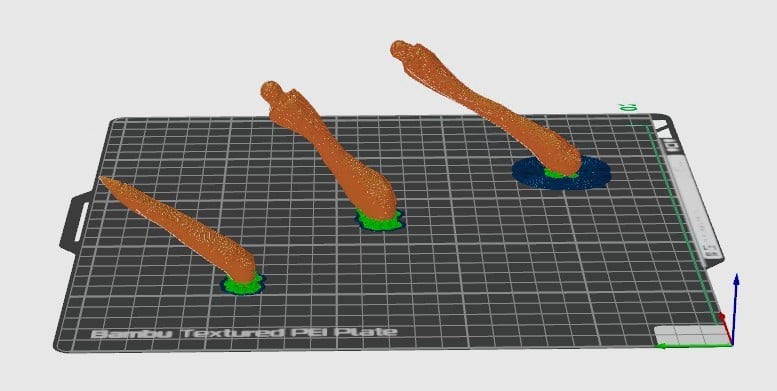
@Silvrav found the below enhanced print-in-place version of the tail, and a remixed body to take the new tail. I think I'm going to give this a try:


https://makerworld.com/en/models/1529323-facehugger-tail-realistic-version


https://makerworld.com/en/models/1529308-facehugger-body-remix


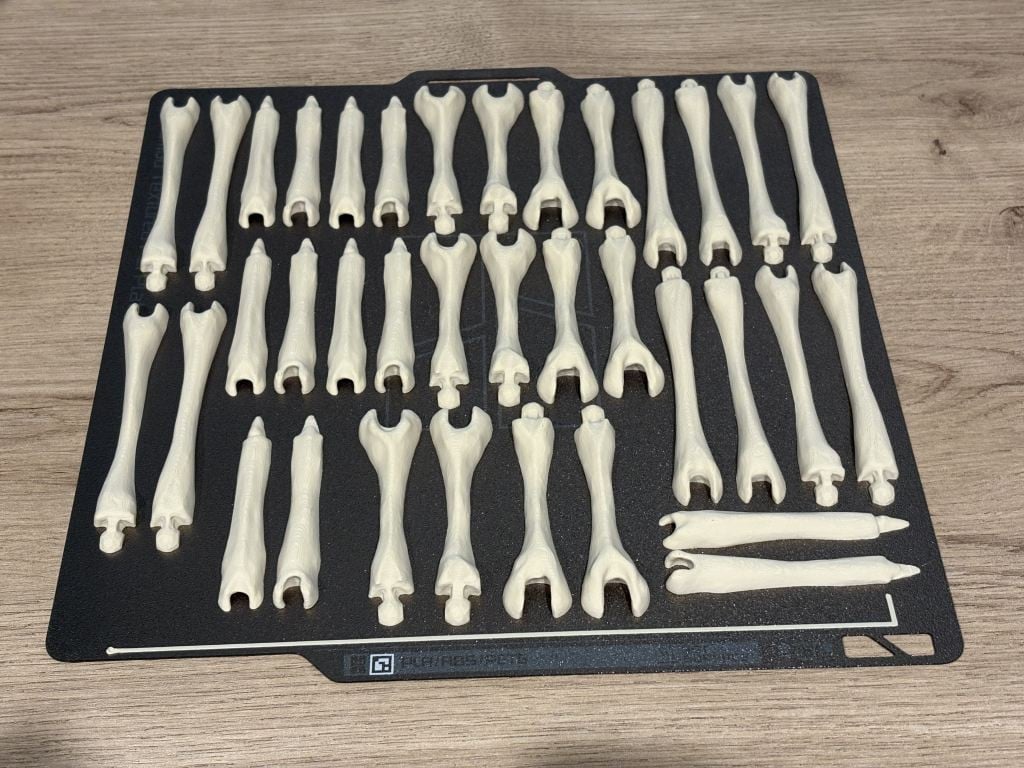
Legs I just grab them from the original model.


Paul1977
5188 posts

Uber Geek
+1 received by user: 2210


  #3391801 8-Jul-2025 10:19
Send private message

@Silvrav


Well, I made a start...


Only have a textured plate so the test pieces I glued together left a visible line at the join since the mating surfaces weren't smooth. Eventually I'll get a smooth plate as well, but for now I think I'll need to sand the base of all the pieces before glueing - which is a bit of a pain.


All the pieces for the legs are printed, currently printing the tail, and tomorrow will be the body.


Doing it at 0.16mm layer height in PLA Matte Desert Tan. Not sure if matte was the right call, as the facehugger should probably look shiny to simulate being wet. But I didn't want it to look plasticy, plus matte hides the layer lines better so I rolled the dice.


Silvrav

477 posts

Ultimate Geek
+1 received by user: 173

ID Verified

  #3391803 8-Jul-2025 10:24
Send private message

That looks nice already! Depending how detail you want to go, those joints will disappear after some filler and sanding. 


Paul1977
5188 posts

Uber Geek
+1 received by user: 2210


  #3391805 8-Jul-2025 10:38
Send private message

Silvrav:


That looks nice already! Depending how detail you want to go, those joints will disappear after some filler and sanding. 


Filling and sanding etc aren’t really my bag. I’ll sand the flat base of all the pieces before glueing together and leave it at that I think.


Paul1977
5188 posts

Uber Geek
+1 received by user: 2210


  #3392346 9-Jul-2025 13:28
Send private message

@Silvrav


Tail came out great. Measures 77cm when fully straight. Body printing now, then it's some sanding and glueing before clipping it all together (at which point I hope nothing breaks, as the ball joints that need to be pushed in place are intentionally tight to allow posing).


Paul1977
5188 posts

Uber Geek
+1 received by user: 2210


  #3392485 9-Jul-2025 17:30
Send private message

Bugger, just realised the damn thing has eight legs, and I only printed six.


Want to support Geekzone and browse the site without the ads? Subscribe to Geekzone now (monthly, annual and lifetime options).
Paul1977
5188 posts

Uber Geek
+1 received by user: 2210


  #3392652 10-Jul-2025 10:56
Send private message

@Silvrav just a heads up if you're seriously thinking of printing the facehugger... the legs are giving me massive issues.


After sanding the bottom of each piece they glue together with a barely visible join line, so at that point it was looking good. But when I push the ball into the socket, the socket often splits on the join. So tried using a little more glue, but then it split a PLA layer above or below the glued join instead. So either way end up with a visible split and a loose joint.


I didn't see them the first time, but the guy who did the different tail and remixed the body also did the leg sections with the pieces already joined (so no glue required) and with hardcoded supports. Did one leg as a test, and printing at the angle he had them the sockets don't split on a PLA layer, but his supports didn't come off clean and left very nasty scarring. Not sure if it's because he did them for 0.2mm and I printed at 0.16mm, or if it's the matte filament... but either way I'm not having much joy.


Am now testing the pre-joined leg sections without his hardcoded supports and trying to figure out the best angle to print them so the sockets don't split, have minimum auto generated organic supports, and still get an acceptable finish.


Learning a lot, but also wasting a lot of filament (all the legs I've done so far are going in the bin). Testing with a different colour now until I get it right because I don't want to run out of the tan I printed the body and the tail in.


Speaking of which... Matte Desert Tan is a bit too light in colour and is REALLY matte. Other Bambu Matte ones I have are more of a satin finish, but this is super matte - so wasn't the best choice for this one (but I'm committed now!). It'll still look pretty good, but if I were to start over I'd use a different filament (or if I had any artistic ability would paint it).


Silvrav

477 posts

Ultimate Geek
+1 received by user: 173

ID Verified

  #3392656 10-Jul-2025 11:00
Send private message

Thanks Paul.


Yip, still keen but just not getting to printing stuff at the moment. Being home only half the time has limitations.lol.


Ya, I think the more you can print as a set/whole the better as glueing always have challenges. Are you using super glue or special 3d printing glue that welds the PLA together rather then glue it together?


geoffwnz
1730 posts

Uber Geek
+1 received by user: 1595

ID Verified

  #3392742 10-Jul-2025 12:56
Send private message

Would printing in something like PETG with a bit more give, be workable for the sockets?


Paul1977
5188 posts

Uber Geek
+1 received by user: 2210


  #3392744 10-Jul-2025 13:10
Send private message

geoffwnz:


Would printing in something like PETG with a bit more give, be workable for the sockets?


Probably, but since I'm not planning on painting this would mean the legs would look different to the rest - and I'm not redoing the whole thing! I think matte PLA is known to be weaker than standard PLA as well, so possibly another reason that wasn't the best choice.


EDIT: The original designer recommends ABS for the legs and using an ABS slurry to weld them together. But I haven't printed ABS before, and had been doing pretty well with PLA up until now.


Paul1977
5188 posts

Uber Geek
+1 received by user: 2210


  #3392746 10-Jul-2025 13:28
Send private message

Silvrav:


Thanks Paul.


Yip, still keen but just not getting to printing stuff at the moment. Being home only half the time has limitations.lol.


Ya, I think the more you can print as a set/whole the better as glueing always have challenges. Are you using super glue or special 3d printing glue that welds the PLA together rather then glue it together?


Superglue. It does hold when done properly on PLA, but then a layer adhesion fails instead. They don't always split, but I'm not going to the effort of sanding and glueing them all to have half of them fail (which is why a tested a couple first before doing the lot).


I'll get there, it'll just take a bit of trial and error. Hopefully you can benefit from my failures when you get around to printing it.


Shop now for Lego sets and other gifts (affiliate link).
geoffwnz
1730 posts

Uber Geek
+1 received by user: 1595

ID Verified

  #3392800 10-Jul-2025 14:17
Send private message

Paul1977:


geoffwnz:


Would printing in something like PETG with a bit more give, be workable for the sockets?


Probably, but since I'm not planning on painting this would mean the legs would look different to the rest - and I'm not redoing the whole thing! I think matte PLA is known to be weaker than standard PLA as well, so possibly another reason that wasn't the best choice.


EDIT: The original designer recommends ABS for the legs and using an ABS slurry to weld them together. But I haven't printed ABS before, and had been doing pretty well with PLA up until now.


My recent discovery on filaments was that matte PLA is slightly stronger than normal.  Matte is the recommended filament for the MultiBoard storage system though I'm using a combination of PLA, PLA+ and PETG.


elpenguino
3585 posts

Uber Geek
+1 received by user: 2960


  #3392950 10-Jul-2025 18:03
Send private message

Paul1977:


After sanding the bottom of each piece they glue together with a barely visible join line, so at that point it was looking good. But when I push the ball into the socket, the socket often splits on the join. So tried using a little more glue, but then it split a PLA layer above or below the glued join instead. 


Can you fit the halves to the ball and then glue ?


Rubber band or something to hold the pieces in place if using 'slow' glue.


Most of the posters in this thread are just like chimpanzees on MDMA, full of feelings of bonhomie, joy, and optimism. Fred99 8/4/21


Paul1977
5188 posts

Uber Geek
+1 received by user: 2210


  #3393012 10-Jul-2025 20:04
Send private message

elpenguino:


Can you fit the halves to the ball and then glue ?


Rubber band or something to hold the pieces in place if using 'slow' glue.


Not easily because most have a ball at one end and a socket at the other, so would need to try to glue and hold multiple pieces at once. I thought about that approach, but just don't think it's possible.


Printing a test leg now with the halves already joined to see how it comes out. The pressure on the socket is vertical and horizontal, so I think having the layers line on the diagonal (by orienting the pieces as below) will give extra strength - but we'll see.


EDIT: And the longest one just fell over.


Paul1977
5188 posts

Uber Geek
+1 received by user: 2210


  #3393054 10-Jul-2025 22:11
Send private message

elpenguino:


Can you fit the halves to the ball and then glue ?


Rubber band or something to hold the pieces in place if using 'slow' glue.


@elpenguino Actually, when I sat down with the pieces and thought it through I could, in theory, do this if I do it in the right order.


I say "in theory" because in practice one of the three leg joints is just too tight so a can't squeeze the socket pieces flush to glue while the ball is in there. But can get some of them done this way, which will save a bit of extra printing. So thanks for the suggestion, I wouldn't have revisited the idea otherwise.


1 | 2 | 3 | 4 | 5 | 6 | 7 | 8 | 9 | 10
View this topic in a long page with up to 500 replies per page Create new topic


Geekzone Live »

Try automatic live updates from Geekzone directly in your browser, without refreshing the page, with Geekzone Live now.


Are you subscribed to our RSS feed? You can download the latest headlines and summaries from our stories directly to your computer or smartphone by using a feed reader.