Geekzone: technology news, blogs, forums
Guest
Welcome Guest.
You haven't logged in yet. If you don't have an account you can register now.


FineWine

2981 posts

Uber Geek

Trusted
Nurse (R)
Lifetime subscriber

#273343 17-Aug-2020 17:22
Send private message

Over the last fortnight we have been busy building a mobile work bench for the garage. We placed it on 6 casters (120Kg rated each caster) of which the 4 corners are lockable. Installed a ToolShed wood vice and a multi-purpose machine vice .


We also mounted a 4 x power board at one end which is connected using an Arlec 15m ext cable with built-in RCD safety switch via a male inlet socket.


The mobility of it enables us to wheel the bench either into the centre of the garage or outside in front of the garage which is where we do most of our saw table work.


On the wall where the bench parks we installed a shelf 2cm off the bench top. The bench rolls under it.


We coated it all in CD50 Extreme timber protector oil.


The bench measures: 72cm wide x 210cm long x 88.5cm high. The height matches the height of the saw table.


Whilst the difficult we can do immediately, the impossible takes a bit longer. However, miracles you will have to wait for.


View this topic in a long page with up to 500 replies per page Create new topic
 1 | 2
wazzageek
1093 posts

Uber Geek

ID Verified
Trusted
Lifetime subscriber

  #2543189 17-Aug-2020 19:24
Send private message

Nice work! Looks like something that I should consider ...


Mehrts
1063 posts

Uber Geek

Trusted

  #2543198 17-Aug-2020 19:44
Send private message

With six casters, there's the possibility that they can end up acting as a see-saw, although it can depend on how much flex/sag the bench can allow.


Nice work though, looks great!


  #2543206 17-Aug-2020 20:04
Send private message

That looks awesome.

Would you be happy to share the plans or cut list with us. I’ve been looking for inspiration to something similar.

I loved the idea of a fixed shelf on the wall above where the workbench is stored. Means you don’t have to remove all the crap you’ve stored on top of the bench to use it.


Technofreak
6530 posts

Uber Geek

Trusted

  #2543240 17-Aug-2020 21:29
Send private message

Every home needs one. I'd want to mount my Bosch compound mitre saw on something like that.


I like the fact you have put a storage area under the bench.


Sony Xperia XA2 running Sailfish OS. https://sailfishos.org The true independent open source mobile OS 
Samsung Galaxy Tab S6
Dell Inspiron 14z i5


networkn
Networkn
32350 posts

Uber Geek

ID Verified
Trusted
Lifetime subscriber

  #2543271 17-Aug-2020 22:27
Send private message

If you could stop by our place and build us something similar, that'd be great. :)


neb

neb
11294 posts

Uber Geek

Trusted
Lifetime subscriber

  #2543274 17-Aug-2020 22:34
Send private message

Is that polished/sealed concrete under there or some sort of floor covering? Been trying to figure out what to do to the floor of the planned workroom in the Casa de Cowboy rebuild.

MikeAqua
7779 posts

Uber Geek


  #2543301 18-Aug-2020 06:49
Send private message

Fantastic


Mike


Trade NZ and US shares and funds with Sharesies (affiliate link).
FineWine

2981 posts

Uber Geek

Trusted
Nurse (R)
Lifetime subscriber

  #2543545 18-Aug-2020 11:28
Send private message

Thanks guys - it was a very rewarding project


@Mehrts - there should not be any sagging as the bottom front and back beams are 45mm x 70mm with same size cross beam in the middle. There is also a 45mm x 145mm beam along the top front to take the weight of the two vices with a 45mm x 70mm along the top back as well as a similar top cross beam. The top is a single 30mm thick sheet of pine laminated worktop panel and the bottom shelve is a 18mm thick sheet of pine laminated worktop panel. Every thing is rebated, glued and screwed with 14g decking screws.


@Senecio - My partner will put together a build list later this week.


@Technofreak - if you zoom in on the picture you can see we have a 15yr Ryobi 1000w compound mitre saw. Also tucked away under the bench is a ToolShed Router 1/4in Variable Speed 1200w, Bosh electric drill, B&D cordless drill, 20yr AEG jigsaw cutter, 15yr SkillSaw, 35yr Makita belt sander, B&D mighty mouse sander, a multitool, angle grinder and other odds & sods. My partner made purpose sized container boxes for all these tools. We also have a Mako mitre saw extendable stand and a ToolShed Roller Stand. Plus the ToolShed saw table you can see in the left corner. There is also a pair of saw horses just out of shot.


@neb - Yes that is polished concrete. Rather abused now what with paint, oil, timber stains etc on it. In the photo the bench is on a bit of old carpet left over from when we made a cat jungle gym. Also there is a large rubber mat left over from when we had our own, little used, multi-gym apparatus.


Whilst the difficult we can do immediately, the impossible takes a bit longer. However, miracles you will have to wait for.


neb

neb
11294 posts

Uber Geek

Trusted
Lifetime subscriber

  #2543598 18-Aug-2020 11:55
Send private message

How do you find that in terms of providing stable footing? Friend of mine recommended it for here as a way of sealing the concrete against stains but I was imagining it'd be rather slippery, particularly if it got anything spilled on it.

FineWine

2981 posts

Uber Geek

Trusted
Nurse (R)
Lifetime subscriber

  #2543610 18-Aug-2020 12:28
Send private message

neb: How do you find that in terms of providing stable footing? Friend of mine recommended it for here as a way of sealing the concrete against stains but I was imagining it'd be rather slippery, particularly if it got anything spilled on it.


Like all shiny smooth surfaces yes it is slippery when wet but not overly so. It is 20yrs old now but it is still way more aesthetically pleasing than non polished concrete. As I stated it is bit abused now and when we bought the house I did soap & water scrub it and then used CRC on it but that just cleaned off the organic stains. The remaining stains are now mostly paint, timber oil and varnish. Polished concrete does make it easy to simply wipe up at the time of spill.


Friends of ours had garage carpet put in. That's OK if you are not a DIYer . The garage is really our main front door as the garage door is mostly always up and we have just a small piece for shoe wipe (65x90cm) in front of the internal door leading into the house and trying to vacuum that when it gets; sawdust, mud & dust etc is a challenge sometimes. So you can image a whole garage. Besides what do you do when you drive in from the rain and your car is dripping wet, it must take awhile for the garage carpet to dry out.


You can get concrete additives these days. One is 'rubcrete' which uses old tyres. Others use polyma's etc. Also you can colourise. 😀 Though if you are a DIYer or car enthusiast then I would just stick to a smooth concrete surface with maybe some of the mentioned additives.


Whilst the difficult we can do immediately, the impossible takes a bit longer. However, miracles you will have to wait for.


FineWine

2981 posts

Uber Geek

Trusted
Nurse (R)
Lifetime subscriber

  #2545389 20-Aug-2020 16:39
Send private message

@Seneci


Workbench Overview 
The workbench was based loosely on the Mitre 10 Easy as guide, “How to build a workbench”.
However the design was modified to suit our needs and the additional use of Laminated Pine Panels for the top and the shelves.


Legs 
Cut the legs to length. A good height for a bench is 900mm. We made ours 885mm to match our Saw Table. The bench top is 75mm thick (a combination of the laminated sheet 30mm and the support rail 45mm) and we have put casters on with a height of 100mm so we pre-cut the legs to 710mm. (885 - 75 - 100 = 710). Use your own calculations depending on the type of top and if you are using casters.


Frame 
For the frame, we used 3x2 rails (70x45mm dressed) and 6x2 rails (140x45mm dressed) We rebated the bottom frame and the top ends (all 3x2’s) so that it sat flush with the legs. In ours we rebated the top and bottom of the legs. If you are not using casters then you may want to rebate the bottom of the legs say 100mm up.  We did not rebate the front and back at the top as we placed the 6x2 rails on top of the legs to strengthen our laminated panel.


To cut the rebate, we used our saw table and adjusted the blade to the depth of the rebate.


Fix the rails into place using the batten screws. Remember to pre-drill the holes for all screws before inserting them into place to avoid the wood splitting.


You should now have the frame for your workbench. Check it is square, by measuring both the diagonals. The measurements should be the same. You can straighten up if you need to by shuffling the frame.


Top Rails
You now need to put in the top rails (6x2’s). You’ll need one to go across the width of the top of the bench at the front and one at the back. Screw into place remembering to pre-drill your holes first.
 
Support Rails
You now need to put in the support rails (3x2’s). You’ll need three to go across the width of the top of the bench (both ends and the middle) between the 6x2’s. You will also need one (or two if having centre casters) to go the width of the bench at the bottom. Measure the distance in between the existing frame and cut the support rails to size. Screw into place remembering to pre-drill your holes first.


Shelf
We created the shelf with a laminated pine panel (1800 x 600 x 18) the same size as our frame. We cut out the corners (100 x 100) to fit around the legs. Screwing this into place.
We created a second half shelf using the same framing wood and an additional laminated panel to create the shelf and the divider.


Top
We used a laminated pine panel (2100 x 900 x 30) which we cut down to 720 wide to create an off cut the same length as our bench top to create an additional wall shelf.


Attach the top (now 2100 x 720 x 30) by screwing from the bottom so you create a clean top for your workbench. Remembering to pre-drill your holes first.


Additional Floating Shelf
We wanted to create a wall shelf that floated above our workbench, so with the off cut from the top (2100 x 180 x 30),using 4 angle brackets (150 x 200) we attached this to the wall just 10mm above the total height of our workbench. This enables us to have lots of things on the shelf and still be able to just wheel our workbench out without the need to move anything else.


Finishing off
We gave the entire workbench (and additional shelf) a protective coat using CD50 Extreme. 3 coats were applied to the top and 2 coats everywhere else.


Mounted both a ToolShed wood vice and a multi-purpose machine vice to complete the project.


NOTE: wood vice mounting bolts x 4 were rebated into the top by approx ½" deep & 1" wide hole then plugged with a piece of 1" dowel and sanded off flush with top.


Materials Used
Assuming the same size as ours


  • Top - 2100 x 720
  • Frame - 1800 x 600
  • Wall shelf - 2100 x 180
  • Legs: 100 x 100mm posts
  • Shelf: Laminated Pine Panel (1800 x 600 x 18) You will need two if you want an extra shelf
  • Bench top and floating shelf: Laminated Pine Panel (2100 x 900 x 30)
  • Frame: 3x2’s, (70 x 45mm) and 6x2’s (140 x 45mm)
  • Batten screws: Zenith 14G x 100mm Galvanised Type 17 Bugle Head Timber Batten Screw (- 25 Pack) - for a flush surface finish
  • Castor - Move It 80mm 120kg White Polypropylene Swivel Plate Castor
  • Castor - Move It 80mm 120kg White Polypropylene Swivel Plate Castor With Brake

Note: we purchased all the above materials used from Bunnings.


  • Powerboard Black+Decker With Individual Switches & Surge Protection 10 amp White (left cord exit) - [Mitre10]
  • Clipsal Type 435A socket Inlet, 3 PIN, 10A, 250V - [electrical wholesaler]
  • Arlec 15m Orange In-Line RCD Safety Switch Heavy Duty Lead Extension - [Bunnings]


Whilst the difficult we can do immediately, the impossible takes a bit longer. However, miracles you will have to wait for.


Handsomedan
7285 posts

Uber Geek

ID Verified
Trusted
Subscriber

  #2545400 20-Aug-2020 16:59
Send private message

This thread makes me feel particularly emasculated...


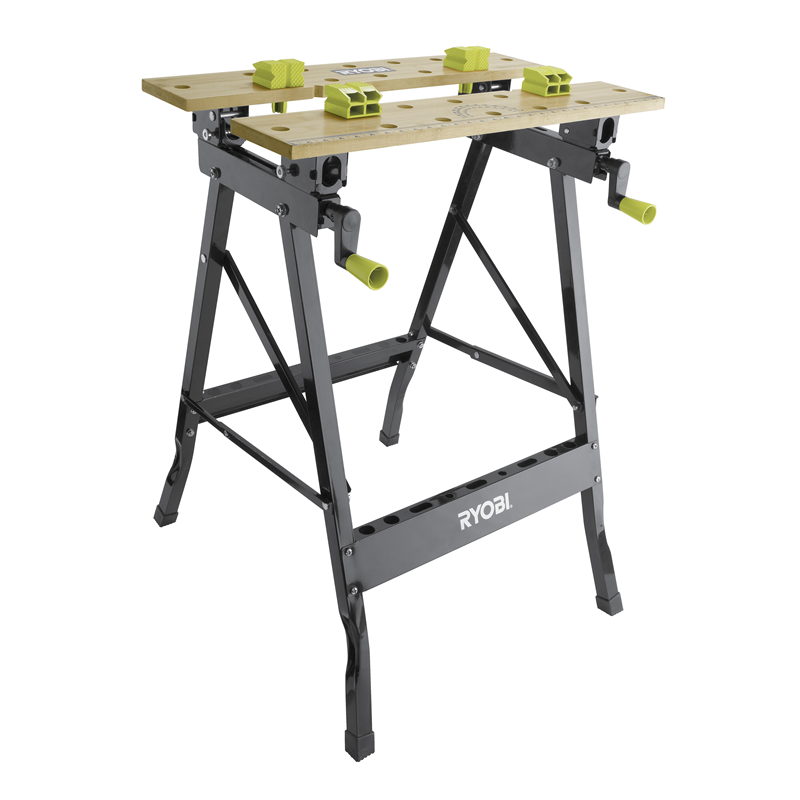
All I have is one of these: https://www.bunnings.co.nz/ryobi-wooden-foldable-workbench_p0254309


I feel woefully inadequate. 


Handsome Dan Has Spoken.
Handsome Dan needs to stop adding three dots to every sentence...


Handsome Dan does not currently have a side hustle as the mascot for Yale 


*Gladly accepting donations...


FineWine

2981 posts

Uber Geek

Trusted
Nurse (R)
Lifetime subscriber

  #2545447 20-Aug-2020 17:04
Send private message

Handsomedan:


This thread makes me feel particularly emasculated...


All I have is one of these: https://www.bunnings.co.nz/ryobi-wooden-foldable-workbench_p0254309


I feel woefully inadequate. 


Don't feel inadequate as we still have one of those except under the Black & Decker brand which we bought in Aussie years ago. It served its purpose well.


Whilst the difficult we can do immediately, the impossible takes a bit longer. However, miracles you will have to wait for.


neb

neb
11294 posts

Uber Geek

Trusted
Lifetime subscriber

  #2545479 20-Aug-2020 17:26
Send private message

FineWine:

Finishing off
We gave the entire workbench (and additional shelf) a protective coat using CD50 Extreme. 3 coats were applied to the top and 2 coats everywhere else.


Being a geek I had to know what this was among the infinite number of timber oils out there. From the MSDS it's a dewaxed heavy mineral oil with fungicide additives.


I'm sure y'all were dying to know that...

neb

neb
11294 posts

Uber Geek

Trusted
Lifetime subscriber

  #2545480 20-Aug-2020 17:28
Send private message

Handsomedan:

This thread makes me feel particularly emasculated...


All I have is one of these: https://www.bunnings.co.nz/ryobi-wooden-foldable-workbench_p0254309


I got the Bosch one from payment for jury duty a few years back. It's useful to do stuff that won't fit on the indoors workbench or will create too much mess/cause breathing problems, I can carry it outside, do whatever needs to be done, and pack it back inside again with the mess/fumes left outdoors.

 1 | 2
View this topic in a long page with up to 500 replies per page Create new topic


News and reviews »

Air New Zealand Starts AI adoption with OpenAI
Posted 24-Jul-2025 16:00


eero Pro 7 Review
Posted 23-Jul-2025 12:07


BeeStation Plus Review
Posted 21-Jul-2025 14:21


eero Unveils New Wi-Fi 7 Products in New Zealand
Posted 21-Jul-2025 00:01


WiZ Introduces HDMI Sync Box and other Light Devices
Posted 20-Jul-2025 17:32


RedShield Enhances DDoS and Bot Attack Protection
Posted 20-Jul-2025 17:26


Seagate Ships 30TB Drives
Posted 17-Jul-2025 11:24


Oclean AirPump A10 Water Flosser Review
Posted 13-Jul-2025 11:05


Samsung Galaxy Z Fold7: Raising the Bar for Smartphones
Posted 10-Jul-2025 02:01


Samsung Galaxy Z Flip7 Brings New Edge-To-Edge FlexWindow
Posted 10-Jul-2025 02:01


Epson Launches New AM-C550Z WorkForce Enterprise printer
Posted 9-Jul-2025 18:22


Samsung Releases Smart Monitor M9
Posted 9-Jul-2025 17:46


Nearly Half of Older Kiwis Still Write their Passwords on Paper
Posted 9-Jul-2025 08:42


D-Link 4G+ Cat6 Wi-Fi 6 DWR-933M Mobile Hotspot Review
Posted 1-Jul-2025 11:34


Oppo A5 Series Launches With New Levels of Durability
Posted 30-Jun-2025 10:15


Geekzone Live »

Try automatic live updates from Geekzone directly in your browser, without refreshing the page, with Geekzone Live now.


Are you subscribed to our RSS feed? You can download the latest headlines and summaries from our stories directly to your computer or smartphone by using a feed reader.