My home office chair is around 15 years old and the fabric and general workings are in very good condition, but the gas strut / gas cylinder had started sinking multiple times per hour which was getting frustrating. I replaced the gas strut myself, which took some time and effort, so I'm posting here how I did it - partly to help others, partly to help myself in ten years when I need to do it again 😉
The gas strut is the part that joins the upper part of your chair that you sit on with the wheels. The whole thing there is the strut, it may be black or silver, it may look like a couple of parts, though it may have a cover that's part of the chair. There's a clip at the bottom which makes it easy to take the wheels off (youtube vid), but you don't need to do that to replace the strut.
I got my replacement strut from Caford Casters, I liked the way they had good information about their struts sizes which most sellers didn't. The sizes and structs are pretty standard apparently, a new strut worked fine in my 15 year old chair. A 140mm stroke length is apparently standard, though I got a slightly longer 160mm stroke so my chair went a bit higher.
The gas strut fits to the chair upper with a friction fit, it's not a screw fit, but it's extremely tight. Over the years maybe it rusts in or something. After trying a few tools and methods I almost gave up on this, after trying for a few days. I called Blair from Office2u to ask if their repair service is available in Wellington. His service isn't available here but he gave me the tips below on the phone which worked great. Here's what we did.
Remove the gas strut from the chair seat upper
- Tip the chair upside down and squirt some CRC into the join between the strut and the chair. Leave it there upside down as long as you can - a couple of hours at least, or overnight. Wipe around it before you move the chair so it doesn't drip onto the floor.
- Put an old towel down on the ground. It may get oil or grease on it.
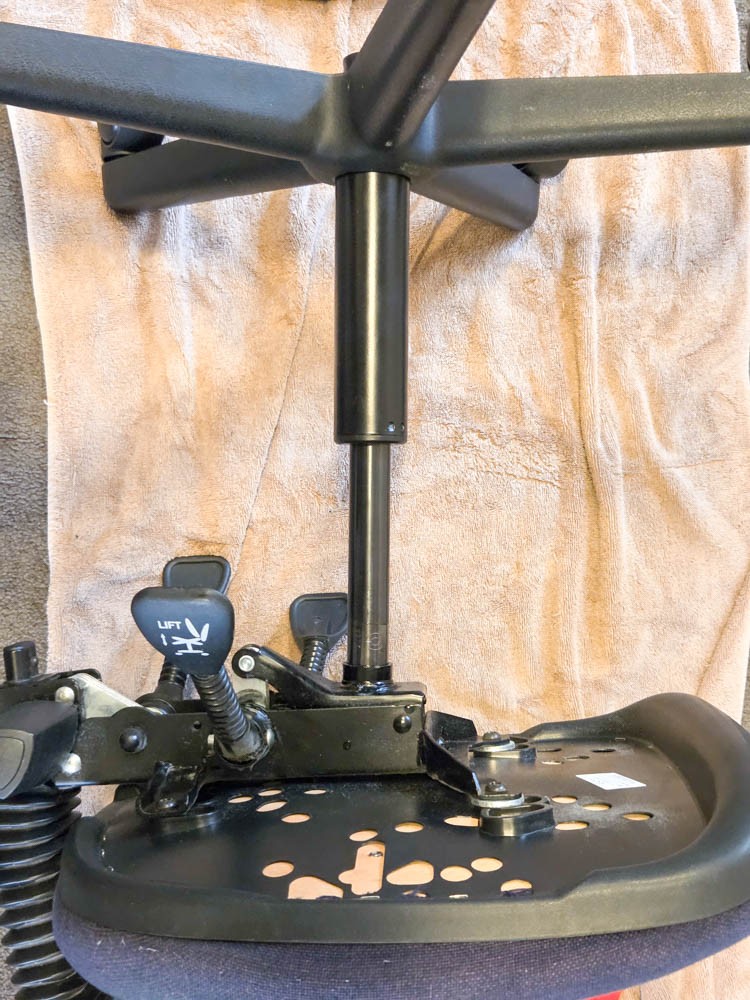
- Put the chair down on its side, with the two lever side down (see 1st photo). This is for stability, doesn't matter that much I don't think.
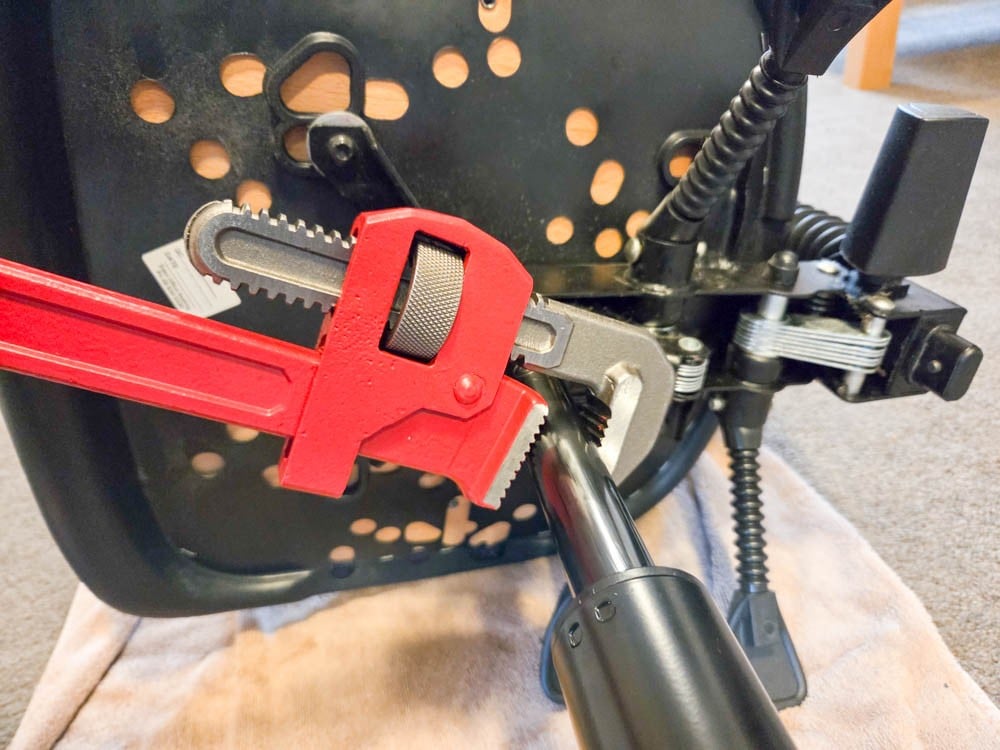
- Put a 600mm pipe wrench on the pipe near where the strut attaches to the chair (see 2nd photo below ). Have the pipe wrench approximately 30 - 40 degrees from horizontal compared with the ground (2 o'clock position)
- Have one person lean over the chair, put all their weight on the side opposite the wrench, to counter its rotation
- Have a second person push down on the wrench using their leg, using their weight and strength. Make sure you're supported as it may move suddenly. You do not want to hit your helper / wife / friend in the face with a 600mm pipe wrench that has been moved with all the strength of your leg (I didn't)
- Alternate sides of the chair the wrench and the counterweight person twisting the gas strut one way then another until the strut moves reasonably freely
- To detach the strut from the chair upper, have the first person who is putting their weight on the chair push the gas strut away from the chair base while the wrench is turning the pipe. This will probably require at least a few and probably many wrench movements, alternating sides each time. If you have a third person have them do the pulling while person one holds the chair still and person two uses the wrench
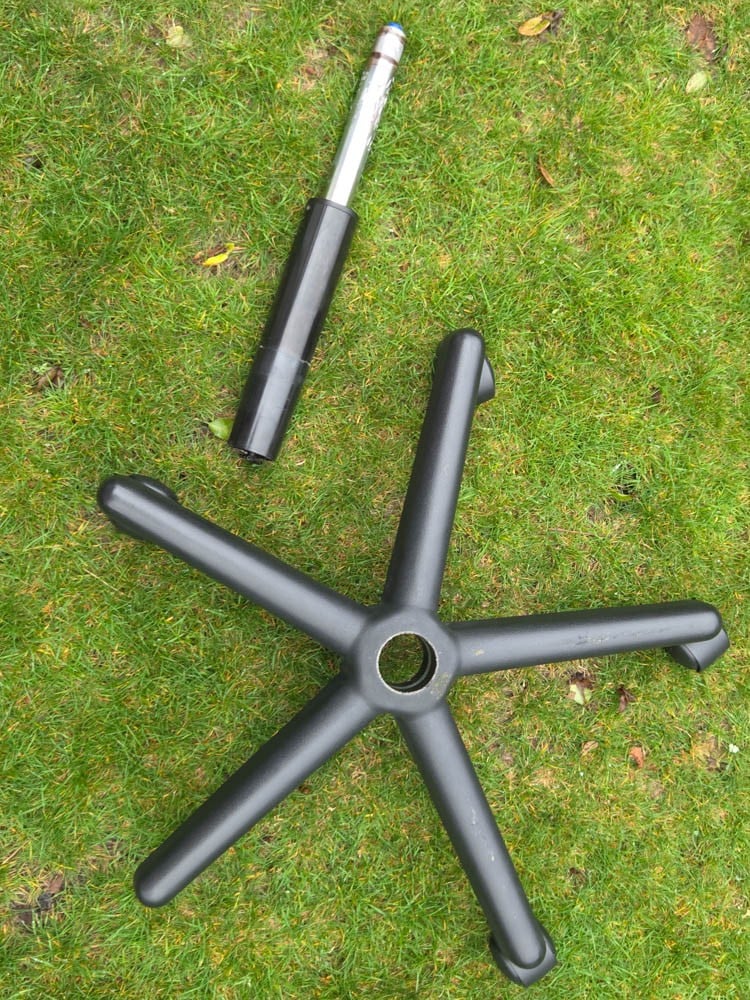
- Eventually the gas strut will pop off (see 3rd photo)
Remove the gas strut from the chair base
- Turn the chair base upside down
- Support the chair legs on another chair, a fence, a saw horse, etc
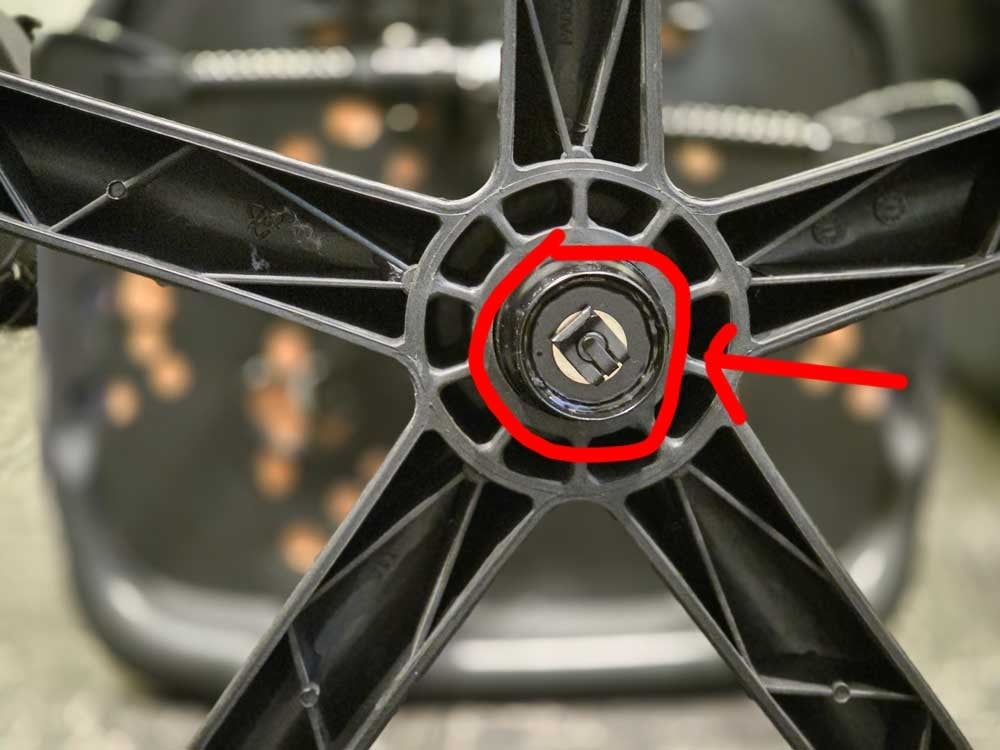
- Put a small block of wood or piece of cardboard over the base of the gas strut - the part that usually faces the floor but is currently facing up (see 4th photo)
- Hit it with the SIDE of a hammer until it comes out. You will probably need to hit it quite hard.
Backup plan
- Take the clip off the bottom of the chair and detach the wheels
- Put the chair upper in a vice and close it extremely hard
- Use your body strength to move the chair while the vice holds the gas strut still
Two youtube videos that I found helpful are this and this.
Chair on it's side ready for work
Pipe Wrench Positioning
Separated Strut
Strut Bottom
This it the bit you put a bit of wood over and hit with the side of the hammer to separate it from the base part of the chair with the wheels.