|
|
|
Funny how similar words can be in very different languages.
And Japanese culture to Westerners falls into the same category. I guess this is why in the space of a post you have mentioned my three favourite countries other than NZ.
Wheelbarrow01:
It's a strange concept but Toyota had different chain stores in Japan for different models prior to 2020. For example if you wanted a Corona, you'd head to your local Toyopet Store. The Sprinter Trueno was only sold at Toyota Auto Stores, whilst the Corolla Levin was only sold at Toyota Corolla Stores, alongside RAV4's(?). Hiluxes and Land Cruisers were not sold in the same stores. It all makes total sense until it doesn't 😄
Thats also the weird grill and badging differences you see on many of the crapbox imports - they were the same car but they put a different badge on the front where the toyota logo was at some of those different dealers to make it a "different" car - I think there were some different options available or not available between the dealers too.
richms:
Thats also the weird grill and badging differences you see on many of the crapbox imports - they were the same car but they put a different badge on the front where the toyota logo was at some of those different dealers to make it a "different" car - I think there were some different options available or not available between the dealers too.
For few decades after WW2, UK car makers Morris, Austin, Riley, Wolseley and maybe one or two others also did this. Sometimes the rebadged cars had minor differences eg. the grille and the Riley Elf was a Mini with a small boot extension at the back and a full width walnut dash.
Sometimes I just sit and think. Other times I just sit.
Quite a minor DIY project, but it's one I've been wanting to do a long time...
Basically, the old plastic badges on the side of my '88 Hilux Surf were well and truly worn out, but you can't buy OEM ones anymore. While there are some ok looking vinyl print facsimiles floating around, I wanted something a little fancier.
Enter these jobbies that I found on eBay that are an aluminium billet with the original logo embedded via CNC machine. No I didn't make them myself - the DIY part comes by virtue of me managing to get the old ones off without breaking the plastic panel (they were stuck on real good and this is now 37 year old plastic that's been exposed to the sun every day), and carefully scaping the old adhesive off and cleaning the surface in preparation for the new ones. A lick of tyre black to the whole panel and voila:


I managed to get the original ones off without cracking them. They are made of a clear piece of plastic - the lettering is carved out on the back side and the letters are infilled with silver and gold paint on a black background. Some owners go through the painstaking process of stripping the old logo paint off and then hand-painting them to bring them back to life. I may have a go but I need a fine brush, a very steady hand and plenty of patience...
For anyone that has followed along with Project e-Vespa, here's an update.
I've just recently clicked over 6,000km in ~20months since it's been on the road. The battery is a 64v 24ah battery or roughly 1.54kw/h. I get approx. 30km of range on a full charge but the BMS only allows me to run down to ~35% capacity to protect the battery so that's about 30km of range per 1.0 kw/h. At 30c per kw/h that 6,000km has cost me ~$60 in electricity. It's actually cost me less as I often charge it at work for the return trip home but total cost is $60. The same distance in my petrol SUV would have cost $1,500. Since it's greater than 40yrs old (classic registration) it only costs $47/yr for the license/registration and fully comprehensive insurance is $300/yr.
I didn't build it to save money (or the planet), but that's just the economics of it once you've incurred the sunk cost of the conversion.
Here's a recent photo. The only change I've made is to replace the seat as the old one was ripped and not very comfortable.
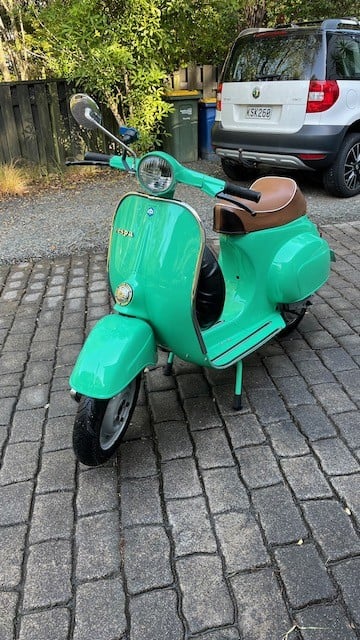
But now for the purpose of this post. I've always wanted to build a 2nd battery to extend the range. ~30kms is quite restrictive, I have a 28km journey each way to and from work. All it takes is a strong head wind and the last 2kms are touch and go whether I get home comfortably or in limp home mode. The only problem is the cost. A 64V 24ah battery requires 144 cells and at $12/cell (+ consumables) it's an expensive exercise to build a battery.
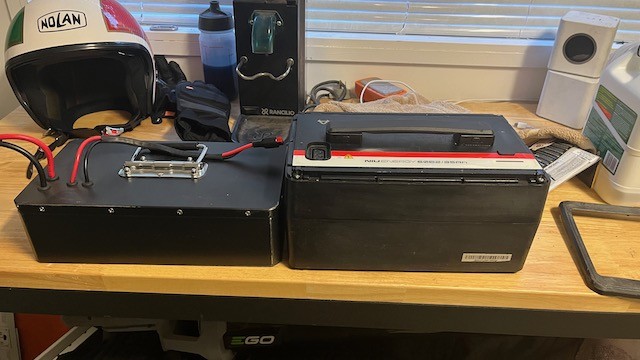
But I think I've just scored the deal of the century. I saw this 2nd hand NIU 60v 35ah battery for sale on FB Marketplace. It came from a crashed scooter that was written off and the owner was just wanting to recover some costs. Picked it up for $300! This is what it looks like on the right sitting next to my current battery on the left.
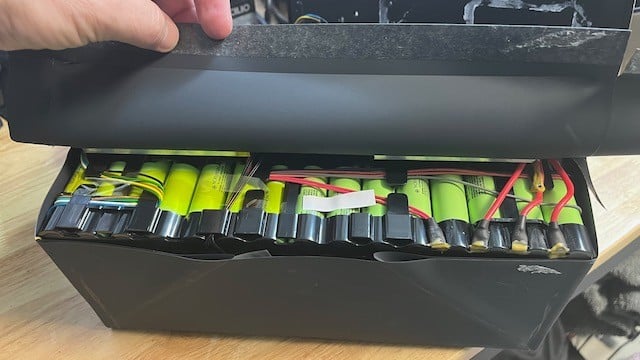
I opened it up expecting to find some relatively inexpensive no-name generic 18650 cells but to my surprise it is full of genuine Panasonic INR 18650GA cells, all 170 of them. That's at least $2,000 of cells at full retail price new. The scooter had only covered 3,500km when it was written off. I can't use it as is, I need to rebuild it to 64v but I should at least be able to build 28ah or even possibly a 32ah battery if I can find a suitable battery box.
So that will be my next project. If anyone is interested enough to see a battery being built I might set up the GoPro in the garage and record a Timelapse.
Damn, what a score!
Keep calm, and carry on posting.
Referral Links: Sharesies - Backblaze -
Are you happy with what you get from Geekzone? If so, please consider supporting us by subscribing.
No matter where you go, there you are.
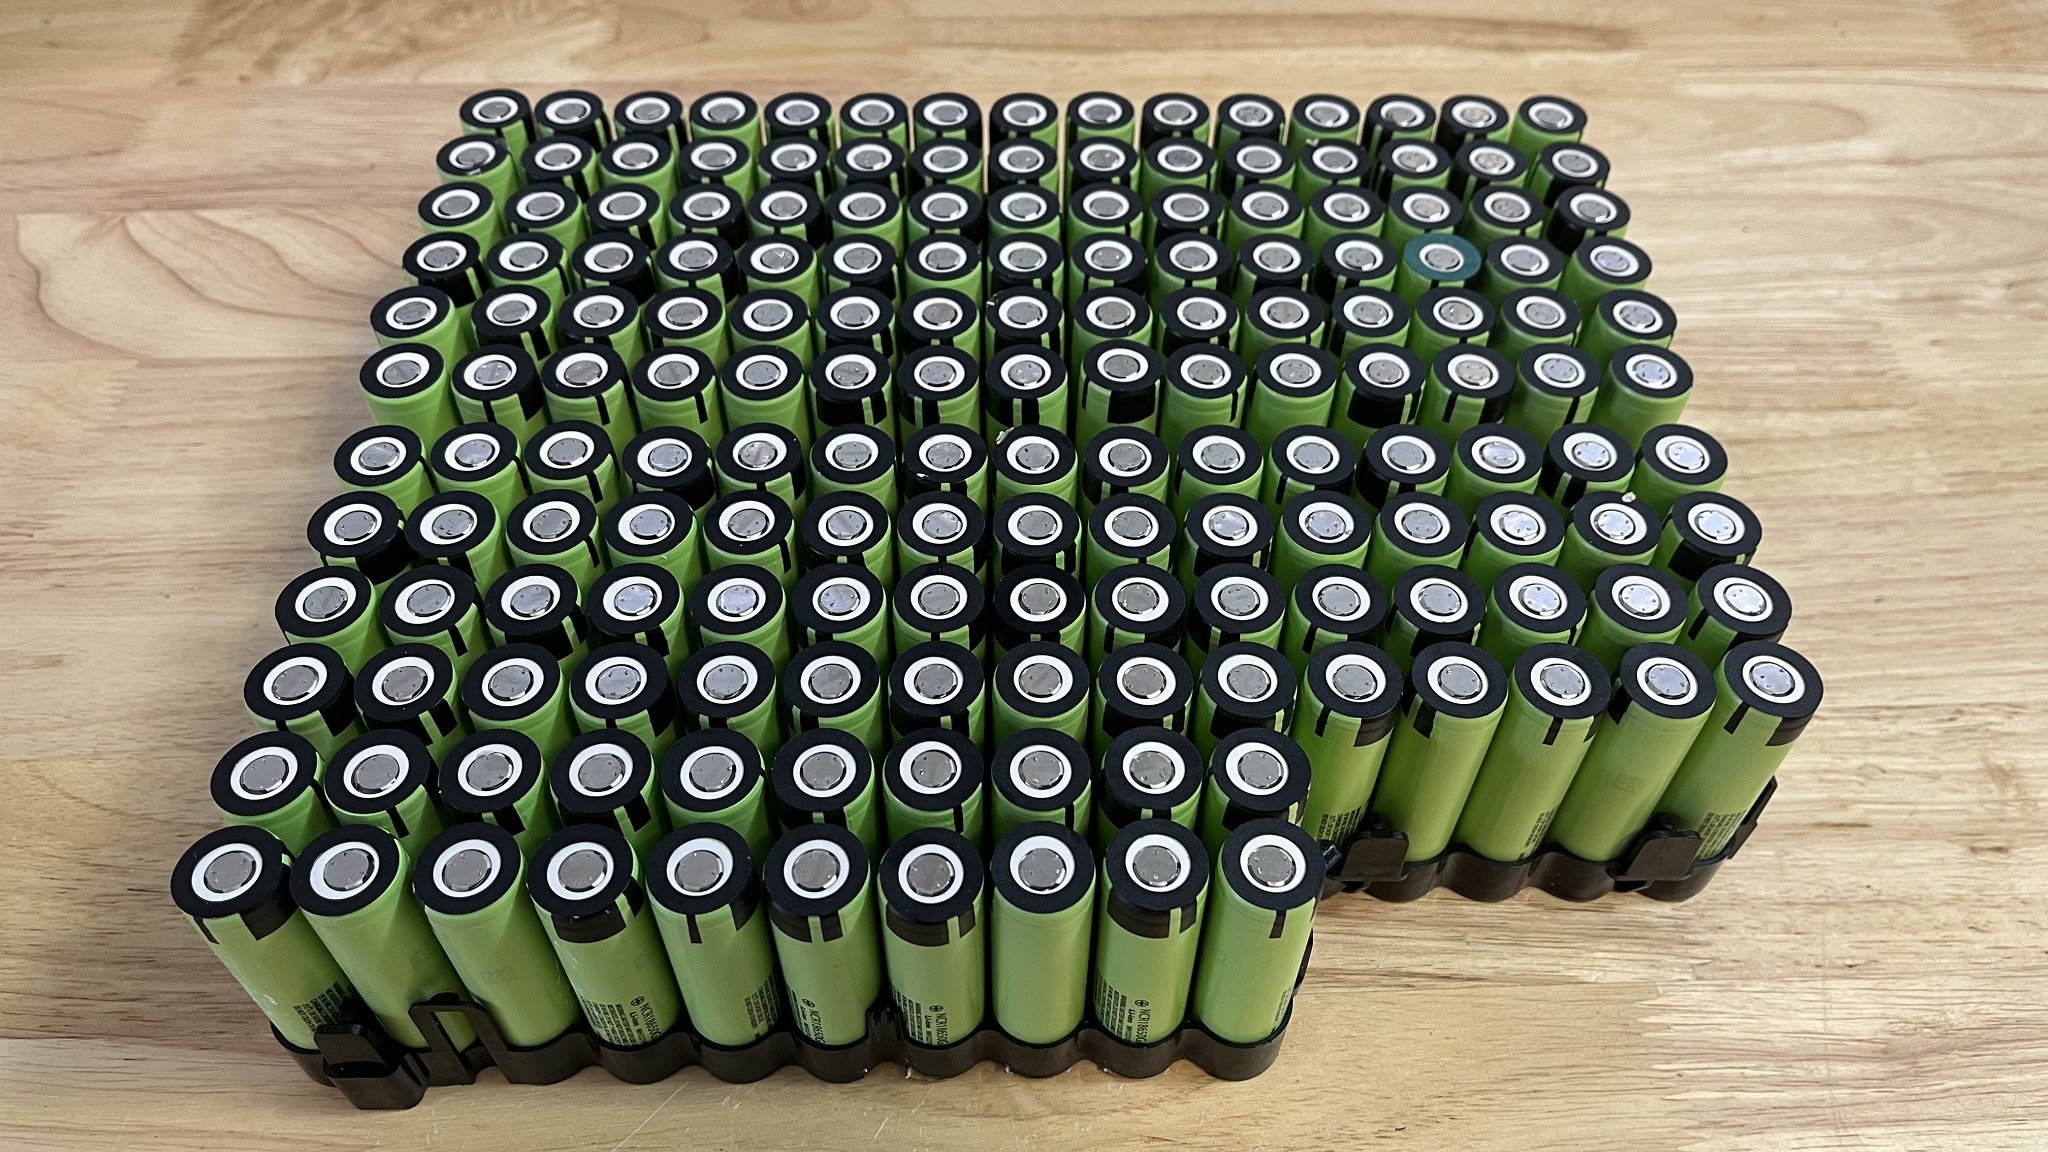
I decided that a rainy, windy Easter long weekend was the perfect time to be brave and tear down the 2nd hand battery. I didn’t set-up the GoPro to record a timelapse as it’s pretty boring and to be honest I was a bit nervous and didn’t want my mistakes being recorded.
But, teardown successful. All 170 cells recovered without any damage or any mistakes made. Tomorrow will be assembly which I will film. At least I hope it will be tomorrow. My spot welder seems to be playing up but hopefully leaving it on charge overnight might fix it.
Senecio:
I decided that a rainy, windy Easter long weekend was the perfect time to be brave and tear down the 2nd hand battery. I didn’t set-up the GoPro to record a timelapse as it’s pretty boring and to be honest I was a bit nervous and didn’t want my mistakes being recorded.
But, teardown successful. All 170 cells recovered without any damage or any mistakes made. Tomorrow will be assembly which I will film. At least I hope it will be tomorrow. My spot welder seems to be playing up but hopefully leaving it on charge overnight might fix it.
That's a real score, if you don't mind documenting the re-build, even in stages, that would be cool to see
Referral Link Quic
Free Setup use R502152EQH6OK on check out
Will definitely document the build. The teardown took the best part of 8-9hrs. Being careful of course not to short any contacts but also pulling the nickel strips off and cleaning up the spot welds on each battery cell is very time consuming.Good news is that the spot welder is taking on a charge now so hopefully we're good to go tomorrow. The build will take another 8-9 hrs but it will happen over two days, because golf in the morning (priorities!).
So I didn't make as much progress as I wanted to yesterday. I started to contruct the battery and discovered that my spot welds just didn't seem to be taking. I just didn't do a good enough job of cleaning up the small tags left from the original welds so there were plenty of air gaps between the battery cell and the nickel strip. 4 hour later with the dremel and everything was cleaned up. This photo was taken while I was about 1/3 of the way through them.
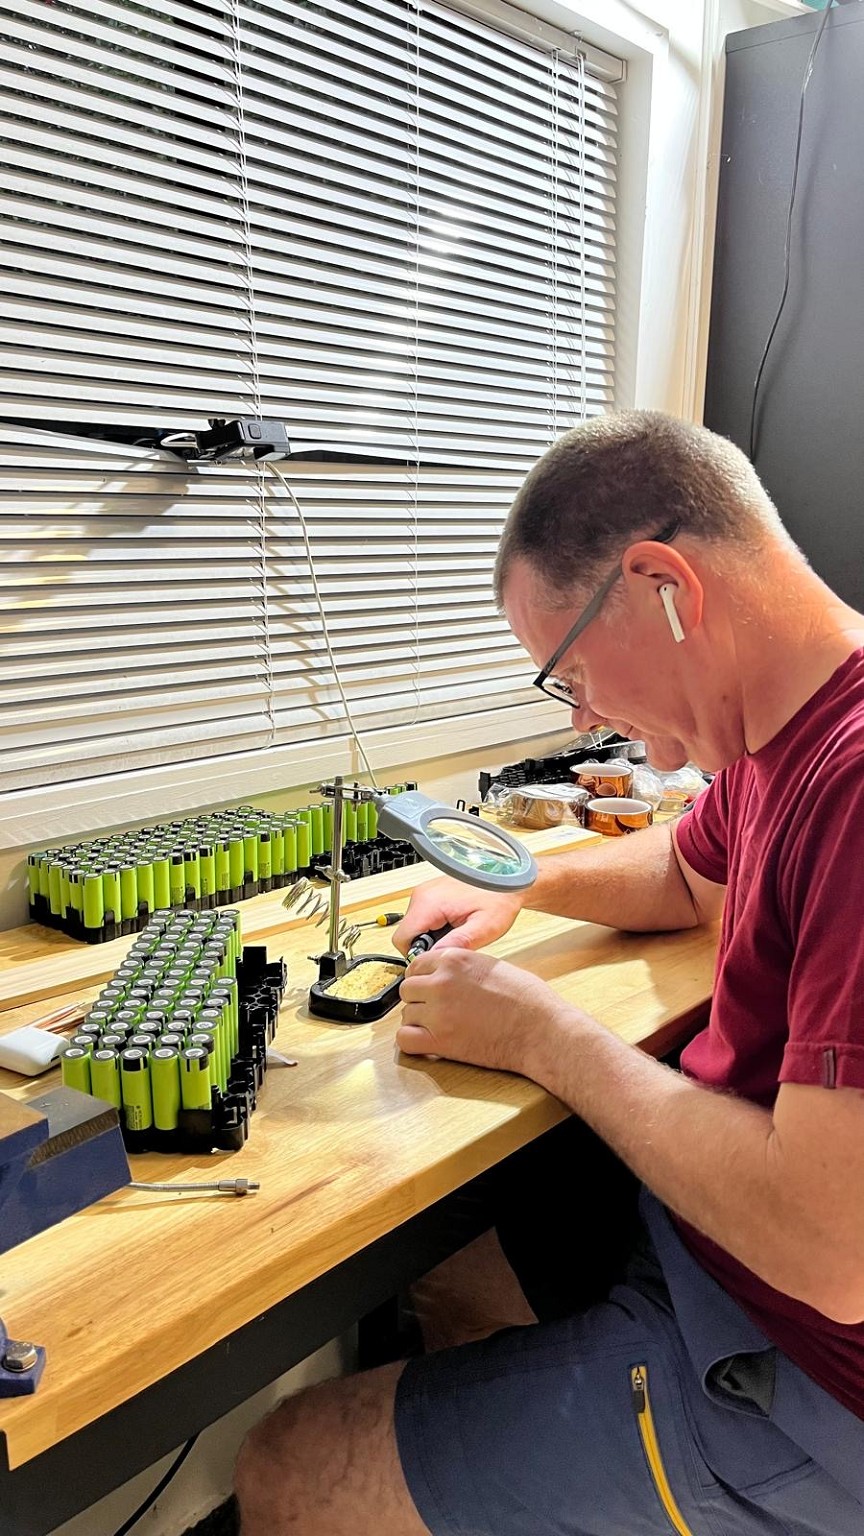
By that time it was getting late so I didn't record a time lapse but managed to build 8 series rows before calling it a night (8 of 18 total). This morning I picked up where I left off and finished building the naked battery but also had to take a break as I didn't have the 12 AWG wire that I needed so its a trip to Jaycar in the morning before I can finally complete this battery tomorrow. So I have a timelapse of this morning's work. Its not particularly exciting as its just hot glueing and spot welding but it gives you and idea of the final size of the naked battery.
So this is what is described as an 18s8p battery. That's 18 cells in series by 8 cells in parallel. That's how you end up with a 64v 28Ah battery (18x3.6 ~64V, 8x3500mAh = 28Ah). So there is 144 cells in total. I would have loved to build an 18s9p battery to take it to 32Ah but I don't have the width under the Vespa seat for a battery that wide. Tomorrow's job is to install the BMS, the charge and discharge cables and shrink wrap it up before placing it in the battery box.
This is where I now ask for help from the Geekzone community. I want to be able to carry both batteries with me to get a total range of ~70km. One under the seat and the second mounted where the spare wheel is currently mounted.
Are there any Geeks in Auckland who can weld, have some metal fabrication skills and would be willing to collaborate on this project? More than happy to cover the cost of materials and your time if anyone can help.
You are a seriously clever guy. Nice work.
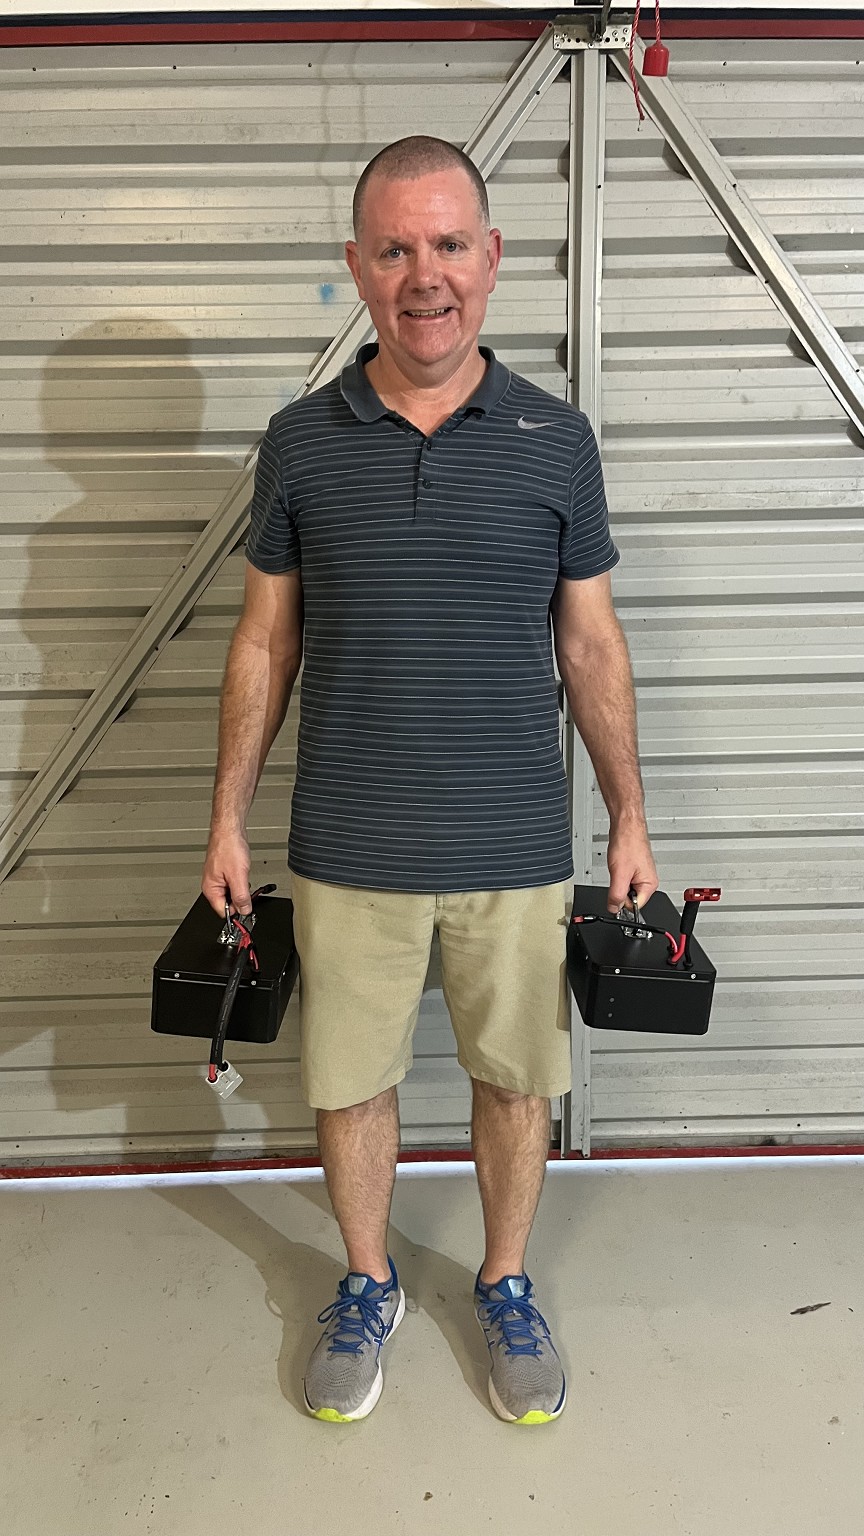
It took an entire Easter long weekend, but I now have two Vespa batteries. Luckily the weather was crap or I would be in serious trouble with the better half!
Looking forward to some better weather so I can test out the new battery. This battery should have ~15% more range than the first battery this will make the trip home from work much more enjoyable as I won’t be worried about going into limp home mode for the final 2kms.
Still to get in touch with anyone that can weld.
what part of auckland are you ?
i have the gear and time but i'm up north.
|
|
|
