Thanks for all the suggestions.
We got a sparky in to quote for upgrading the switchboard and to install an additional power socket on the wall, and we also asked about hardwiring ethernet. Based on the age they reckon the power to the sleepout won't be ducted, so they recommended digging a trench to run data cable from the house into the sleepout. I hadn't really considered that approach before, but I think it's worthwhile, and I reckon it's something I could probably manage.
My plan is to run Cat6 cable from the main switch through the roof (where cabling runs to the bedrooms) and then exit the house on the wall facing the sleepout. We'd then run some ducting down the side of the house (under house is too difficult at that corner, with almost zero access) and trench across the backyard to the sleepout and enter via the external wall.
I'm thinking the way to approach this project would be to install the wiring in the sleepout while we have the wall lining off, before the gib goes up, and then terminate with wallplates. I'm planning to have three ethernet jacks - one at each end of the room, and a third to connect a wifi AP. I'd dig the trench in a few weeks time and lay the conduit, running the cables through the conduit back to the house, up the ducting and entering the house by the roof cavity, and then running the cables back down to the switch.
My questions:
1. What kind of conduit would be recommended to lay in the trench? Total length is around 15m, so I'm guessing I'll need to join several lengths. What should I use to join the lengths?
2. What kind of ducting would be recommended for fixing to the side of the house? Presumably, it needs to be UV protected?
3. If we're not digging the trench before we run the cables in the sleepout, would we just have the run of ethernet cable sitting outside ready and waiting? That doesn't seem like the best approach. Should I then dig the trench first, and hold off running any cable in the sleepout until the trench is ready? Or is there some way to join the cables coming in from the trench to the cabling inside the sleepout?
4. The sparky said the trench needs to be 300mm deep. Is that right? How wide should I aim for? Any tips on good trench digging technique or tools to make it easier?
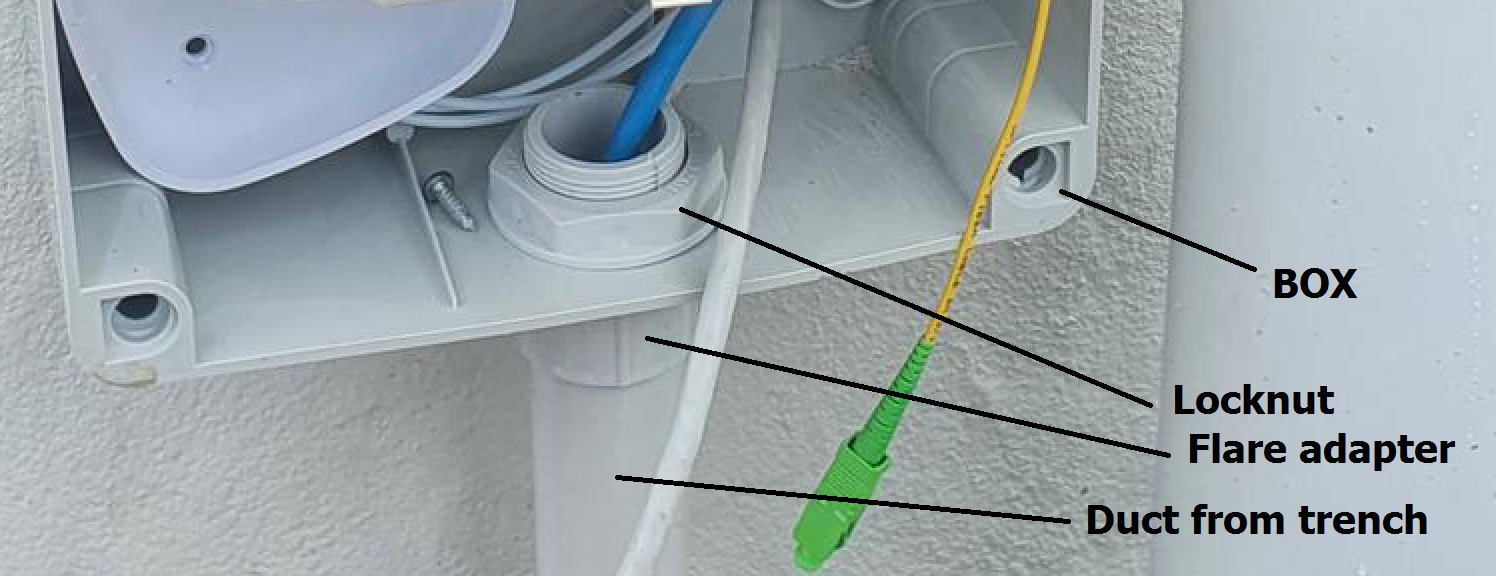
5. Any advice for making sure where the cables enter the house/sleepout are weathertight? Is there some kind of product which is recommended for making sure water doesn't get in?
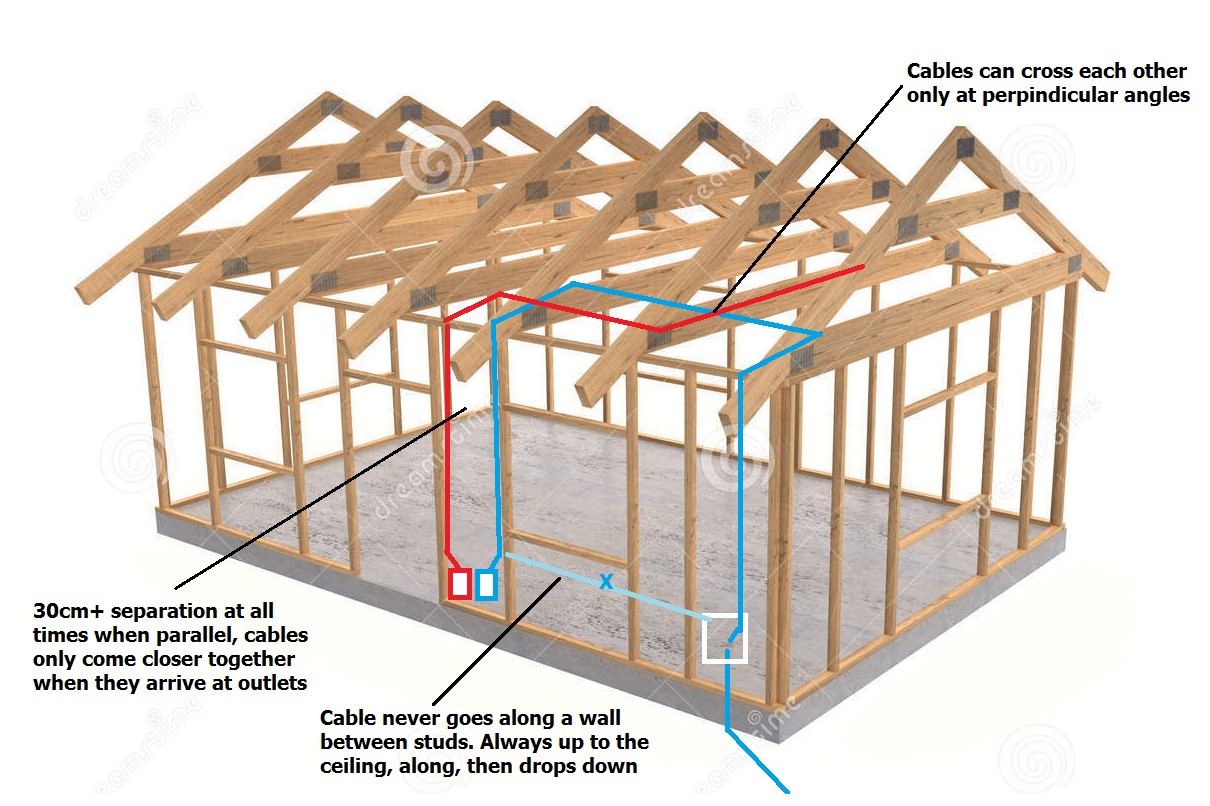
6. Is there any issue running ethernet cable next to power cable in the walls? I'm guessing not, but thought it worth checking.